DIY Indoor Wood Burning Stove: Your Best Guide in 2025
Creating a warm and inviting atmosphere in your home, especially during the cold months, is a goal for many homeowners. One of the most effective and aesthetically pleasing ways to achieve this is by installing a DIY indoor wood burning stove. Not only does it provide a sustainable and efficient source of heat, but it also adds a rustic charm that enhances the overall ambiance of your living space. If you’re considering taking on the project of installing a DIY indoor wood burning stove, this guide will walk you through everything you need to know, from choosing the right stove to maintaining it for long-term use.
Understanding the Benefits of a DIY Indoor Wood Burning Stove
Before diving into the installation process, it’s important to understand why a DIY indoor wood burning stove is a valuable addition to your home. Several key benefits make this project worthwhile:
Energy Efficiency
A DIY indoor wood burning stove can significantly reduce your home’s reliance on conventional heating methods, such as electric or gas heating systems. Wood is a renewable resource, and when burned in a properly installed stove, it can produce a considerable amount of heat with minimal environmental impact. By opting for a DIY indoor wood burning stove, you are taking a step towards energy independence and reducing your carbon footprint.
Cost Savings
Heating your home with wood can be much more cost-effective than relying solely on electricity or natural gas. While there is an initial investment in the stove and installation materials, the ongoing costs are relatively low, especially if you have access to inexpensive or free firewood. Over time, a DIY indoor wood burning stove can pay for itself through savings on your energy bills.
Aesthetic Appeal
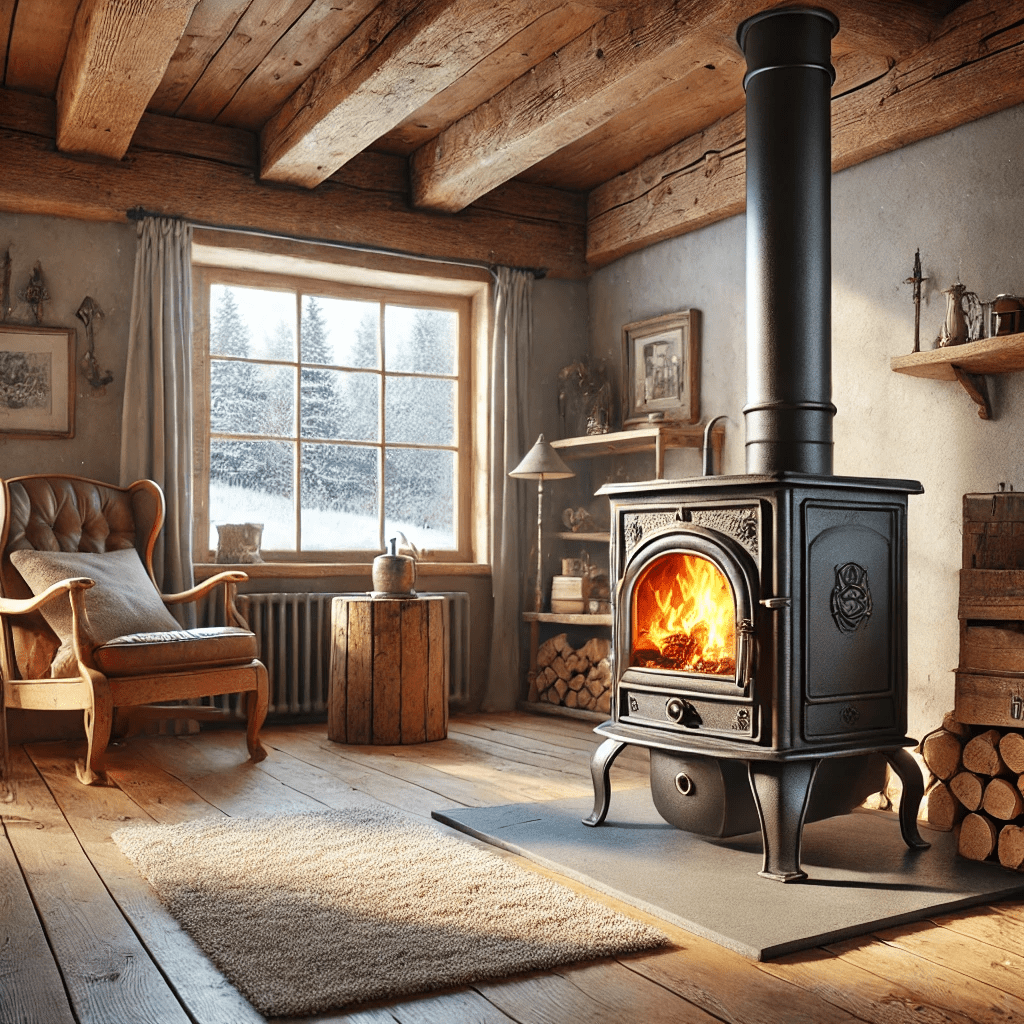
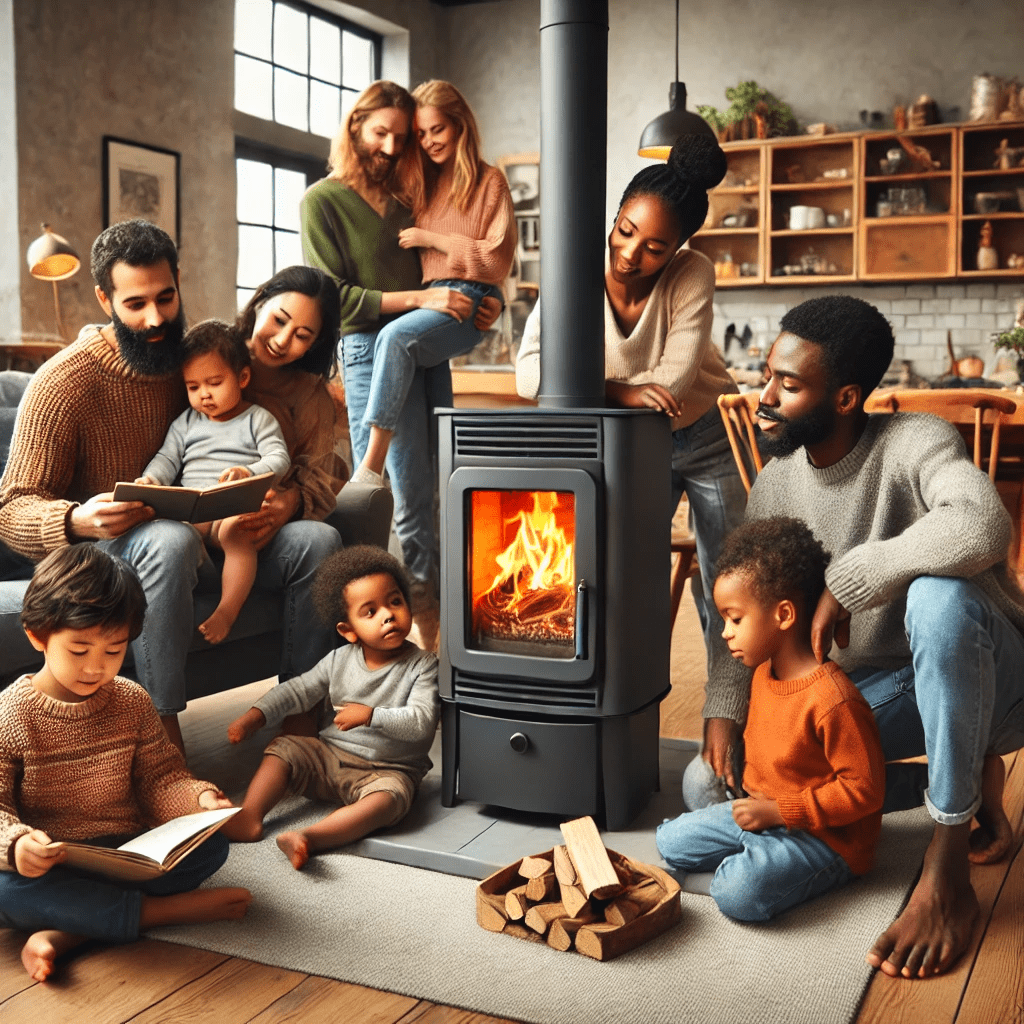
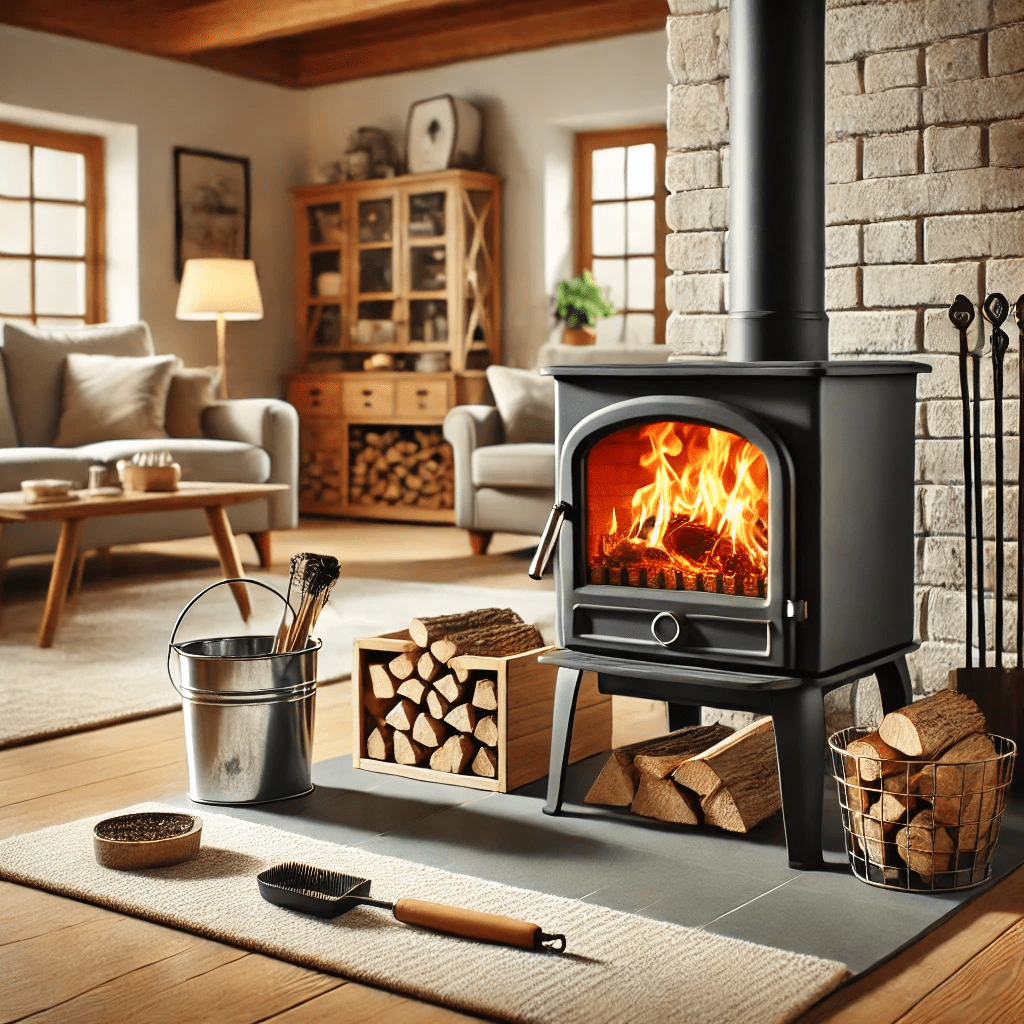
There’s something undeniably charming about the look of a wood burning stove. Whether your home has a modern, rustic, or traditional design, a DIY indoor wood burning stove can complement your interior decor. The sight and sound of a crackling fire can create a cozy and inviting atmosphere that is perfect for relaxing with family and friends.
Versatility
A DIY indoor wood burning stove isn’t just for heating your home. Many models come with cooking surfaces or ovens, allowing you to prepare meals using the heat from the stove. This can be particularly useful during power outages or in off-grid situations.
Sustainability
Using a DIY indoor wood burning stove contributes to sustainable living. Wood is a carbon-neutral fuel, meaning that the carbon dioxide released during burning is offset by the carbon absorbed by trees during their growth. When you source your wood locally and responsibly, you’re also supporting sustainable forestry practices.
Choosing the Right DIY Indoor Wood Burning Stove
Selecting the right DIY indoor wood burning stove for your home is a crucial step that will determine the success of your project. There are several factors to consider when making your choice, including the size of the stove, the type of fuel it uses, and the materials it is made from.
Size and Heating Capacity
The size of your DIY indoor wood burning stove should be matched to the size of the space you intend to heat. Stoves are rated by their heating capacity, typically measured in British Thermal Units (BTUs). A stove with a higher BTU rating will produce more heat, making it suitable for larger spaces. However, if your stove is too large for the room, it may overheat the space, making it uncomfortable. Conversely, a stove that is too small may not provide adequate heat during colder months.
Material and Construction
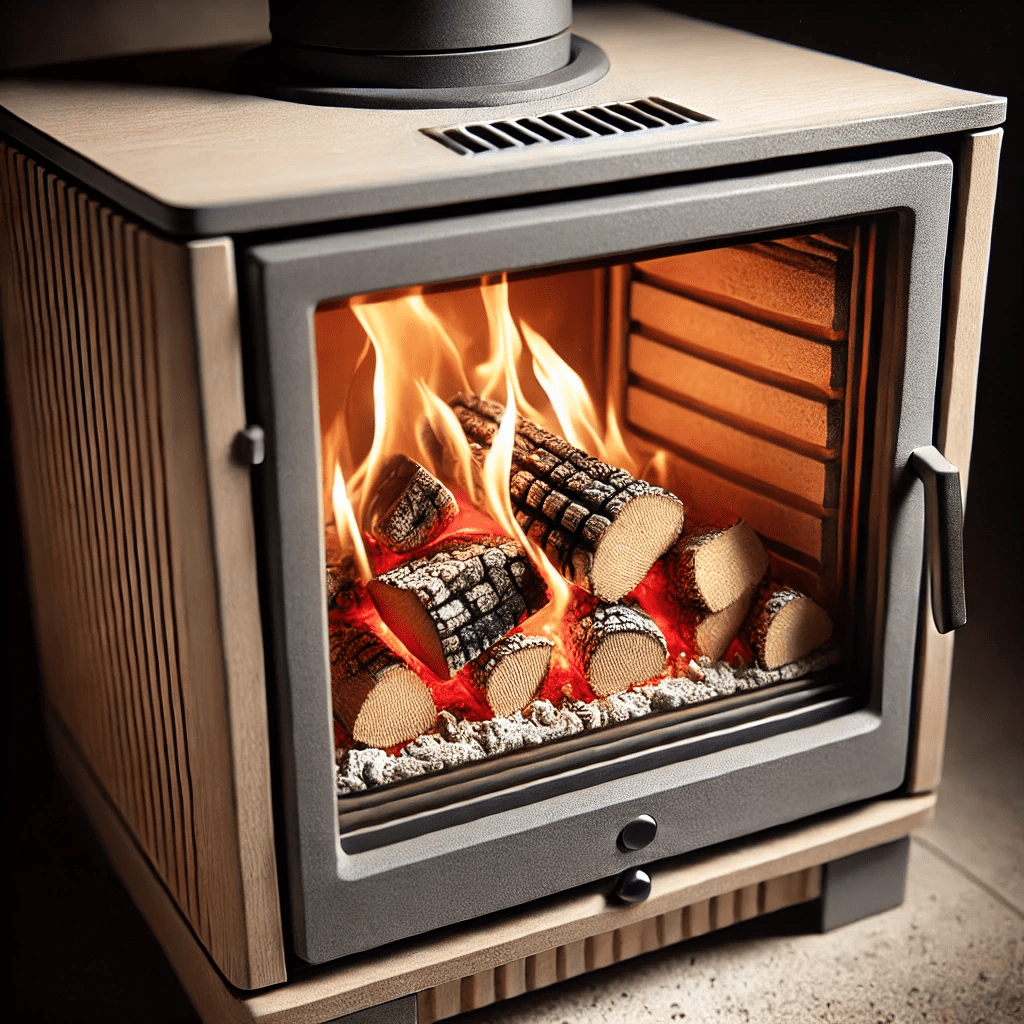
DIY indoor wood burning stoves are typically made from either cast iron or steel. Cast iron stoves are known for their durability and heat retention. They can stay warm for hours after the fire has burned out, providing long-lasting warmth. Steel stoves, on the other hand, heat up more quickly and are generally lighter and easier to install. Both materials have their advantages, so your choice will depend on your specific needs and preferences.
Type of Wood Burning Stove
There are several types of wood burning stoves to consider for your DIY indoor wood burning stove project:
- Traditional Wood Stoves: These stoves burn firewood directly and are known for their classic design and high heat output. They are a popular choice for DIY installations due to their simplicity and effectiveness.
- Pellet Stoves: Pellet stoves burn compressed wood pellets, which are a byproduct of wood processing. These stoves are highly efficient and produce less ash and creosote than traditional wood stoves. However, they require electricity to operate the pellet feed system, which may not be ideal for all situations.
- Masonry Stoves: These stoves are constructed from brick, stone, or concrete and are designed to absorb and slowly release heat over time. They are ideal for homes that require steady, long-lasting warmth. However, they are more complex to build and install, making them a more challenging DIY project.
- Multi-Fuel Stoves: These stoves can burn both wood and other fuels, such as coal or peat. This versatility can be advantageous if you have access to different types of fuel. However, they are typically more expensive and may require more maintenance.
Emission Standards and Efficiency
When selecting a DIY indoor wood burning stove, it’s important to choose a model that meets current emission standards. In the United States, the Environmental Protection Agency (EPA) sets standards for wood stoves to reduce air pollution. Look for stoves that are EPA-certified, as they are more efficient and produce fewer emissions. This not only benefits the environment but also ensures that your stove operates efficiently, saving you money on fuel.
Aesthetic Considerations
Your DIY indoor wood burning stove will be a focal point in your home, so it’s important to choose a design that complements your interior decor. Stoves come in a variety of styles, from traditional to contemporary, and can be finished in different colors and textures. Consider the overall look you want to achieve and select a stove that enhances your space.
Preparing the Installation Area for Your DIY Indoor Wood Burning Stove
Once you’ve selected the perfect DIY indoor wood burning stove, the next step is to prepare the installation area. Proper preparation is essential for ensuring the safety and efficiency of your stove. Here’s what you need to do:
Selecting the Installation Location
The location of your DIY indoor wood burning stove is critical. You’ll need to choose a spot that allows for proper ventilation, heat distribution, and easy access to the stove for loading wood and maintenance. The stove should be placed on the ground floor of your home, as heat naturally rises. Avoid placing the stove near flammable materials, such as curtains, furniture, or wooden walls.
Floor Protection
Before installing your DIY indoor wood burning stove, you’ll need to prepare the floor beneath it. The stove must be placed on a non-combustible surface to protect your flooring from heat and stray embers. Common materials for floor protection include ceramic tile, stone, or a prefabricated stove pad. The protective surface should extend at least 18 inches beyond the front of the stove and 12 inches on the sides and back.
Wall Protection
If your DIY indoor wood burning stove will be placed near a wall, you’ll need to install a heat shield to protect the wall from heat damage. Heat shields are typically made from metal or ceramic and are installed with an air gap between the shield and the wall to allow for proper ventilation. The heat shield should extend at least 36 inches above the top of the stove and cover the area behind and beside the stove.
Ventilation and Chimney Installation

Proper ventilation is essential for the safe operation of your DIY indoor wood burning stove. The stove must be connected to a chimney that vents smoke and gases to the outside of your home. Here’s how to ensure proper ventilation:
- Chimney Type: Choose the appropriate type of chimney for your stove. Metal chimneys are commonly used for DIY installations because they are easier to work with and install. Masonry chimneys are more traditional but require more skill to construct.
- Chimney Placement: The chimney should run vertically from the stove to the roof, with as few bends as possible. Horizontal runs should be minimized to reduce the risk of creosote buildup and ensure proper draft.
- Chimney Height: The chimney must extend at least 3 feet above the roofline and 2 feet higher than any structure within 10 feet of the chimney. This ensures that smoke is properly vented away from your home and reduces the risk of chimney fires.
- Chimney Cap: Install a chimney cap to prevent rain, snow, and debris from entering the chimney. A cap also helps to keep animals out and prevents downdrafts that can cause smoke to enter your home.
- Air Intake: If your home is tightly sealed, you may need to install an outside air intake to provide the stove with a steady supply of combustion air. This is particularly important for newer homes that are designed to be energy-efficient.
Installing Your DIY Indoor Wood Burning Stove
With the installation area prepared, it’s time to install your DIY indoor wood burning stove. This process requires careful attention to detail to ensure that the stove operates safely and efficiently. Follow these steps to complete your installation:
Positioning the Stove
Begin by positioning the stove on the prepared floor surface. Make sure the stove is centered on the pad and has adequate clearance from walls and other objects. Use a level to ensure that the stove is perfectly level, as this will affect the stove’s performance and safety.
Assembling the Stovepipe
The stovepipe connects the stove to the chimney and must be assembled correctly to ensure proper ventilation. Here’s how to assemble and install the stovepipe:
- Stovepipe Sections: Stovepipes typically come in sections that need to be fitted together. Start by attaching the first section to the stove’s flue collar. Secure the section with screws or clips according to the manufacturer’s instructions.
- Fitting the Stovepipe: Continue adding sections of the stovepipe until you reach the chimney connection. Make sure each section is securely fastened and that the joints are sealed with high-temperature silicone to prevent smoke leaks.
- Chimney Connection: The stovepipe should connect to the chimney with an appropriate adapter. Make sure the connection is airtight and properly aligned to ensure a smooth draft.
- Installing a Damper: Consider installing a stovepipe damper to control the airflow and improve the stove’s efficiency. The damper is installed in the stovepipe and allows you to adjust the draft, which can help regulate the temperature and reduce wood consumption.
Securing the Chimney
With the stovepipe in place, it’s time to secure the chimney. Follow these steps to ensure the chimney is properly installed:
- Securing the Chimney to the Roof: Use appropriate brackets and flashing to secure the chimney to the roof. The flashing should be installed where the chimney passes through the roof to prevent water leaks.
- Insulating the Chimney: If you’re using a metal chimney, consider insulating it to improve the draft and reduce the risk of creosote buildup. Insulated chimneys are also safer, as they reduce the amount of heat that escapes into your home.
- Final Chimney Inspection: Once the chimney is installed, inspect it for any gaps, loose connections, or other issues that could affect performance. Make sure the chimney cap is securely in place and that the entire system is free of obstructions.
Testing the Installation
Before lighting your first fire, it’s important to test the installation to ensure that everything is working properly. Here’s how to conduct a thorough test:
- Visual Inspection: Start by visually inspecting the entire system, including the stove, stovepipe, and chimney. Look for any signs of damage, misalignment, or other issues.
- Airflow Test: Open the stove’s air intake and damper to allow maximum airflow. Light a small piece of paper in the stove and watch to see if the smoke is properly vented up the chimney. If the smoke backs up into the room, there may be a draft issue that needs to be addressed.
- First Fire: Once you’re confident that the system is working correctly, you can light your first fire. Start with a small fire and gradually add more wood as the stove heats up. Monitor the stove and chimney closely during this process to ensure everything is functioning as expected.
Operating Your DIY Indoor Wood Burning Stove Safely
Once your DIY indoor wood burning stove is installed and operational, it’s important to follow safe operating practices to protect your home and family. Here are some key safety tips:
Firewood Selection and Storage
The type of wood you burn in your DIY indoor wood burning stove has a significant impact on its performance and safety. Here’s what you need to know:
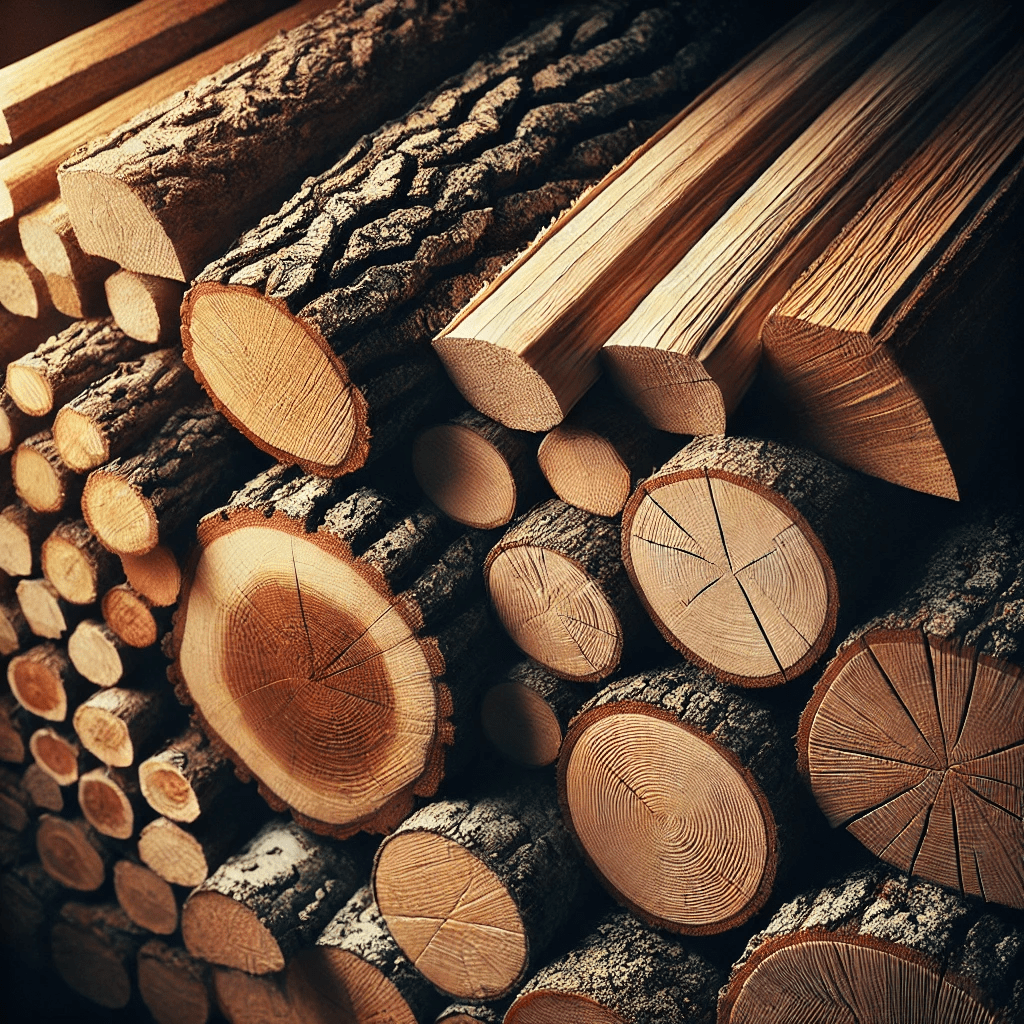
- Choosing Firewood: Hardwoods, such as oak, maple, and hickory, are the best choice for your stove. These woods burn longer and hotter than softwoods, such as pine or spruce. They also produce less creosote, which reduces the risk of chimney fires.
- Seasoning Firewood: Firewood should be properly seasoned before use. This means the wood has been allowed to dry for at least six months to a year. Well-seasoned wood burns more efficiently and produces less smoke and creosote.
- Storing Firewood: Store your firewood in a dry, well-ventilated area. Keep the wood off the ground and covered to protect it from moisture. Do not store large quantities of firewood inside your home, as this can attract pests and increase the risk of fire.
Lighting and Maintaining the Fire
Properly lighting and maintaining the fire in your DIY indoor wood burning stove is crucial for safe operation. Follow these steps to ensure a successful and safe fire:
- Starting the Fire: Begin by placing crumpled newspaper or fire starters in the stove, followed by small pieces of kindling. Light the newspaper and allow the kindling to catch fire before adding larger pieces of wood.
- Adding Wood: Once the fire is established, gradually add larger logs to the stove. Avoid overloading the stove, as this can reduce airflow and create excessive smoke.
- Maintaining the Fire: To maintain a steady fire, add wood as needed and adjust the air intake and damper to control the airflow. A well-maintained fire should burn steadily with minimal smoke.
- Extinguishing the Fire: When you’re ready to let the fire burn out, stop adding wood and allow the fire to die down naturally. Close the damper and air intake to prevent heat from escaping through the chimney.
Monitoring and Cleaning the Stove
Regular monitoring and cleaning of your DIY indoor wood burning stove are essential for safety and efficiency. Here’s what you need to do:
- Ash Removal: Remove ashes from the stove regularly to maintain airflow and prevent ash buildup. Ashes should be placed in a metal container with a tight-fitting lid and stored outside, away from combustible materials.
- Chimney Cleaning: The chimney should be inspected and cleaned at least once a year, or more frequently if you use the stove regularly. Creosote buildup in the chimney can lead to dangerous chimney fires.
- Stove Inspection: Regularly inspect your stove for signs of wear or damage, such as cracks in the firebox or warping of metal components. Address any issues promptly to ensure safe operation.
Safety Precautions
Operating a DIY indoor wood burning stove comes with certain risks, so it’s important to take the following safety precautions:
- Smoke and Carbon Monoxide Detectors: Install smoke and carbon monoxide detectors in your home, particularly in areas near the stove. Test the detectors regularly to ensure they are functioning properly.
- Fire Extinguisher: Keep a fire extinguisher in an easily accessible location near the stove. Make sure everyone in your household knows how to use it in case of an emergency.
- Child and Pet Safety: If you have children or pets, consider installing a safety gate around the stove to prevent accidental contact with the hot surface.
- Burning Practices: Never burn trash, treated wood, or other non-wood materials in your stove. These materials can produce toxic fumes and excessive creosote.
FAQs About DIY Indoor Wood Burning Stoves
How often should I clean my DIY indoor wood burning stove?
It’s recommended to clean the stove and chimney at least once a year, or more frequently if you use it regularly. Regular cleaning helps prevent creosote buildup, which can lead to chimney fires.
Can I install a DIY indoor wood burning stove in any room of my house?
While it’s possible to install a stove in most rooms, it’s important to ensure that the room has adequate ventilation and meets all local building codes and safety regulations. The stove should also be installed on a non-combustible surface and away from flammable materials.
What kind of wood should I burn in my DIY indoor wood burning stove?
The best wood to burn in your stove is well-seasoned hardwood, such as oak, maple, or hickory. These woods burn longer and produce more heat than softwoods, making them ideal for heating your home.
Do I need a professional to install my DIY indoor wood burning stove?
While it’s possible to install a wood burning stove yourself, it’s important to have a good understanding of the installation process and local building codes. If you’re unsure about any aspect of the installation, it’s recommended to consult a professional.
How can I improve the efficiency of my DIY indoor wood burning stove?
To improve efficiency, use well-seasoned hardwood, ensure proper ventilation, and regularly clean the stove and chimney. Installing a stovepipe damper can also help control airflow and reduce wood consumption.
Conclusion
A DIY indoor wood burning stove is not just a heating solution; it’s a project that adds character, warmth, and sustainability to your home. From choosing the right stove to maintaining it properly, this guide has provided you with all the information you need to complete your DIY indoor wood burning stove project successfully.
For more inspiration and tips on enhancing your living space, consider exploring our posts on DIY home gym pulley system and the best pillow for migraines. Additionally, check out This Old House for more detailed advice on home improvements and Energy.gov for tips on improving your home’s energy efficiency. With the right preparation and care, your DIY indoor wood burning stove will provide you with warmth and comfort for many years to come.