DIY Home Gym Pulley System: Your Best Guide in 2025
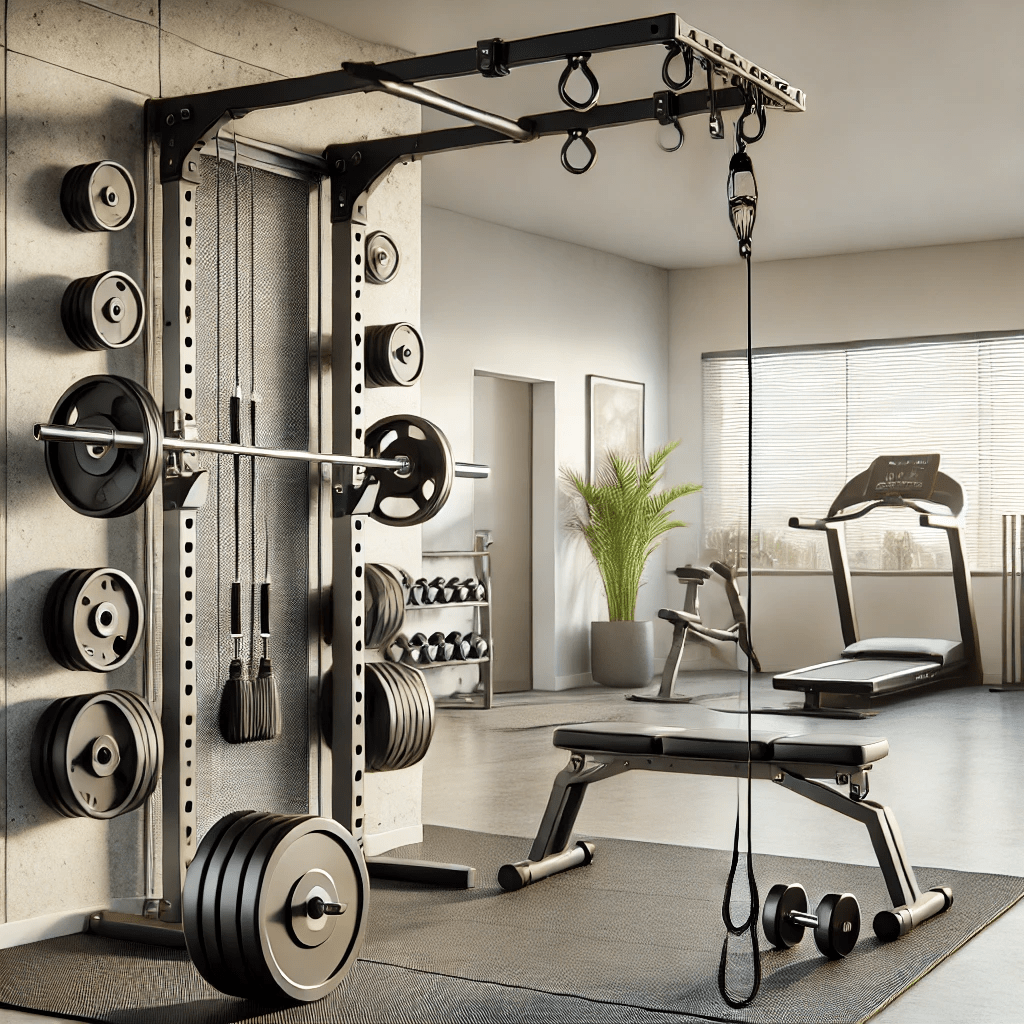
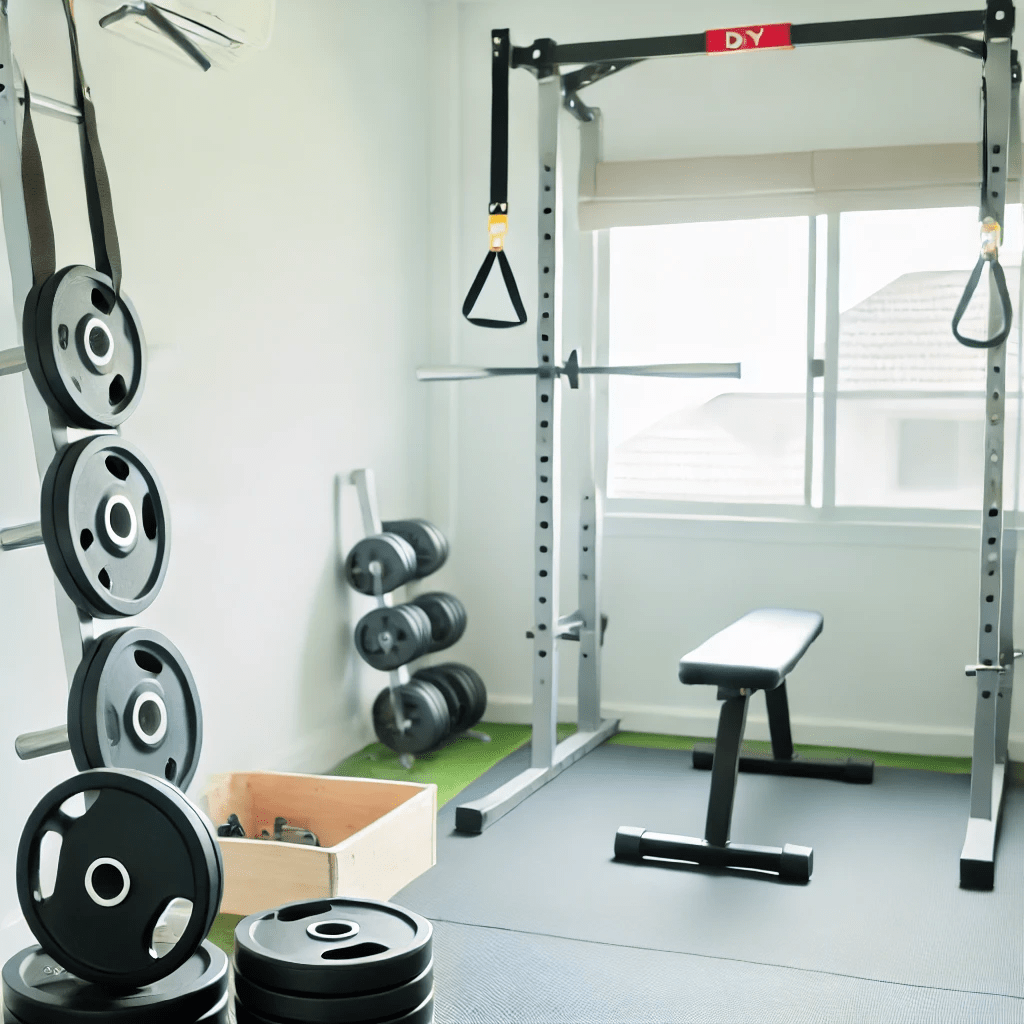
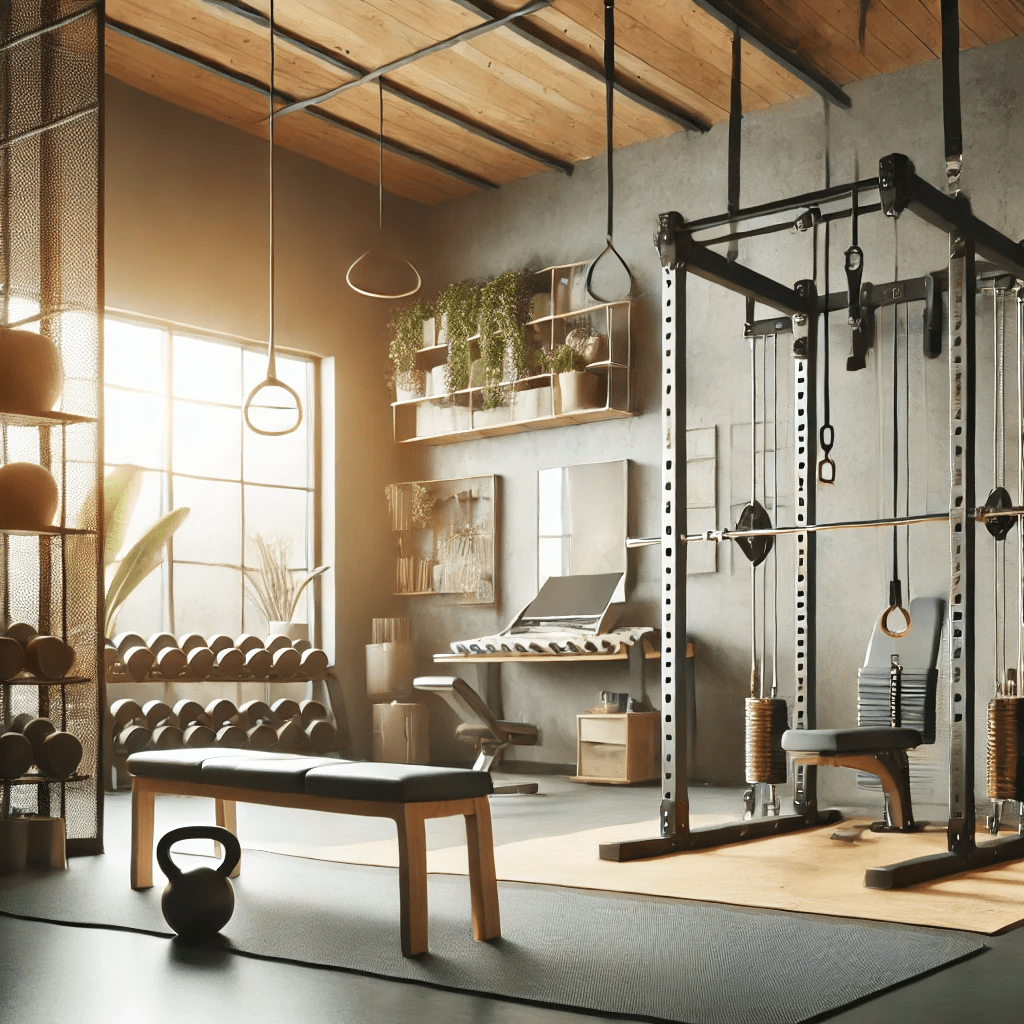
Creating a DIY home gym pulley system is one of the best ways to add versatility and efficiency to your workout routine without breaking the bank. A DIY home gym pulley system allows you to perform a wide range of exercises that target different muscle groups, all from the comfort of your home. Whether you’re looking to build muscle, increase strength, or improve your overall fitness, a DIY home gym pulley system is valuable to any home gym setup. This comprehensive guide will walk you through everything you need to know about building your DIY home gym pulley system, from planning and materials to assembly and safety tips.

Why You Should Consider a DIY Home Gym Pulley System
A DIY home gym pulley system offers a multitude of benefits that make it an excellent choice for fitness enthusiasts. First and foremost, a DIY home gym pulley system is incredibly cost-effective. Commercial pulley systems can be expensive, but by building your own, you can save a significant amount of money while still achieving a high-quality workout experience. Additionally, a DIY home gym pulley system is highly customizable. You can tailor the design to fit your specific space and workout needs, ensuring that your system works perfectly for you.
Moreover, a DIY home gym pulley system allows for a wide range of exercises that can target every major muscle group. From lat pull-downs and tricep extensions to bicep curls and leg exercises, the possibilities are virtually endless. This variety helps prevent workout boredom and ensures that you can continue to challenge your muscles in new ways. Furthermore, because you are building the system yourself, you can choose the quality of the materials, ensuring that your DIY home gym pulley system is both durable and safe.
Planning Your DIY Home Gym Pulley System
Before diving into the construction of your DIY home gym pulley system, it’s essential to spend some time planning. Proper planning will ensure that your system meets your needs and functions smoothly. Start by assessing the space where you plan to install the pulley system. Consider the dimensions of the area, including the height, width, and depth, to determine the size and type of pulley system that will fit best.
Next, consider the types of exercises you want to perform with your DIY home gym pulley system. Different exercises may require different pulley configurations or attachments. For example, if you plan to do lat pull-downs, you will need a pulley system with a high anchor point. On the other hand, if you want to perform rows or other seated exercises, you may need a pulley system with a low anchor point. By considering these factors in advance, you can design a DIY home gym pulley system that is both versatile and effective.
Materials Needed for Your DIY Home Gym Pulley System
To build a DIY home gym pulley system, you will need several key materials. The quality and durability of these materials are critical to the safety and functionality of your pulley system, so it’s important to choose wisely. Here is a list of the essential materials you’ll need:
- Pulleys: High-quality pulleys are the heart of your DIY home gym pulley system. Look for pulleys that are designed to handle heavy loads and that operate smoothly. Ball-bearing pulleys are often a good choice because they reduce friction and ensure a smoother motion.
- Steel Cable: The cable will be used to connect the weight to the handle. Steel cable is preferred because of its strength and durability. Make sure the cable is rated for the weight you plan to use in your workouts.
- Mounting Brackets: These brackets will be used to secure the pulleys to the ceiling, wall, or other support structures. It’s crucial to use strong, durable brackets that can withstand the forces generated during your workouts.
- Weight Plates: You’ll need weight plates to provide resistance in your pulley system. Standard weight plates are fine, but you might want to consider plates with a hole in the center large enough to accommodate the cable.
- Carabiners: These will be used to attach the cable to the pulleys and the handle. Make sure to choose carabiners that are rated for the load they will be carrying.
- Handle or Bar: This is the part of the pulley system you will hold onto during your exercises. You can use a variety of handles depending on the exercises you plan to do, including straight bars, tricep ropes, or even a single handle for one-arm exercises.
- Tools for Assembly: To assemble your DIY home gym pulley system, you will need basic tools such as a drill, wrenches, screwdrivers, and possibly a hacksaw if you need to cut the cable to length.
Step-by-Step Guide to Building a DIY Home Gym Pulley System
Step 1: Choose the Location
The first step in building your DIY home gym pulley system is to choose the location where you will install it. Ideally, you want to select a spot that is both convenient and safe. The location should have enough space for you to move freely while performing exercises, and it should be close to a solid structure, such as a wall or ceiling beam, that can support the system’s weight.
Consider the types of exercises you plan to perform with your DIY home gym pulley system when choosing the location. For example, if you plan to do lat pull-downs, you will need a space with enough vertical clearance. If you plan to do rows, you will need enough horizontal space. Additionally, consider the proximity to other gym equipment or furniture to ensure you have enough room to work out comfortably.
Step 2: Install the Mounting Brackets
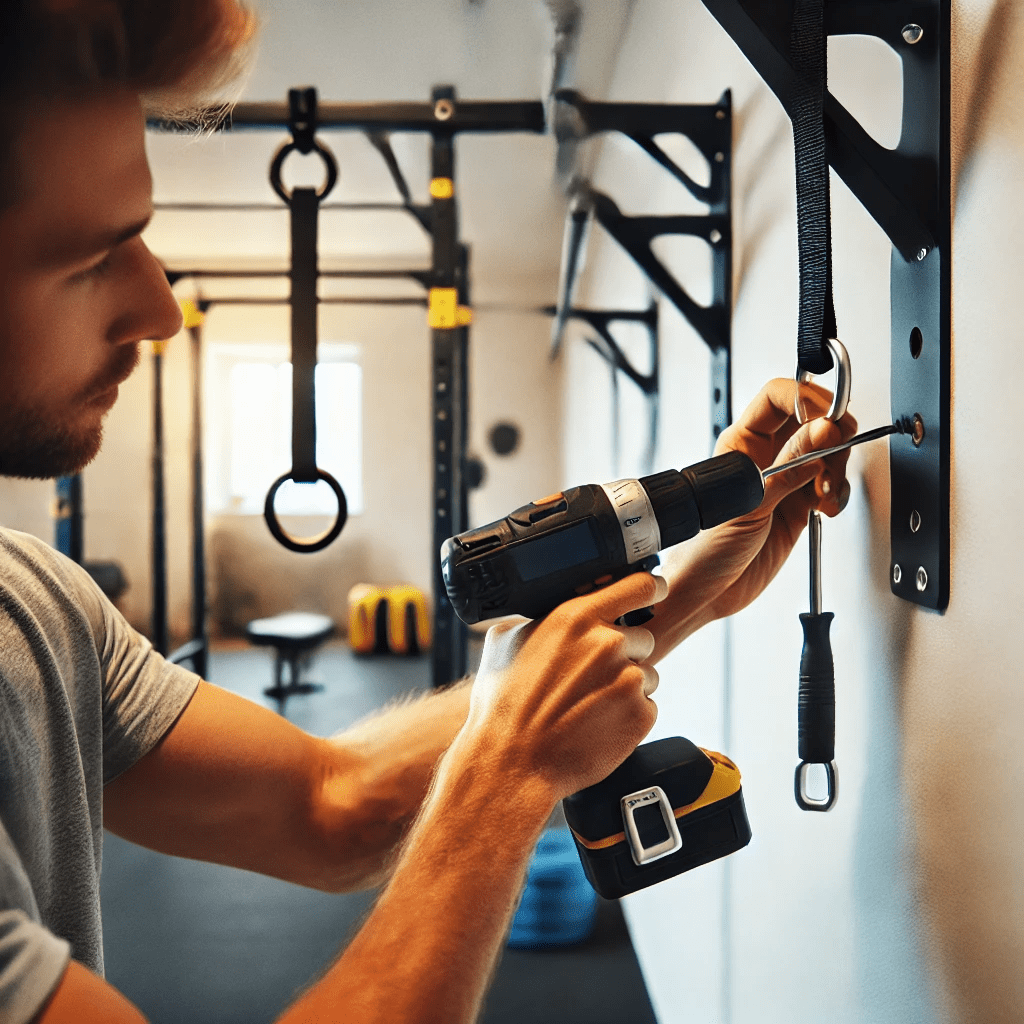
Once you have chosen the location, the next step is to install the mounting brackets that will hold the pulleys in place. The mounting brackets should be securely attached to a solid structure, such as a ceiling beam or wall stud. Use a stud finder to locate a suitable support structure, and then use heavy-duty screws or bolts to attach the brackets.
It’s essential to ensure that the mounting brackets are level and properly aligned. Misaligned brackets can cause the pulley system to operate unevenly, which could lead to wear and tear on the cable or pulleys. If you are installing multiple pulleys, make sure they are all aligned with each other to ensure smooth operation.
Step 3: Attach the Pulleys
With the mounting brackets in place, the next step is to attach the pulleys. Depending on the design of your DIY home gym pulley system, you may need one or more pulleys. For example, a simple lat pull-down system might only require a single pulley, while a more complex system might involve multiple pulleys for different exercises.
Attach the pulleys to the mounting brackets using the carabiners. Make sure the pulleys are securely attached and that they can rotate freely. The smoother the rotation, the better the performance of your DIY home gym pulley system. If you are using multiple pulleys, make sure they are all positioned correctly to create the desired path for the cable.
Step 4: Thread the Cable
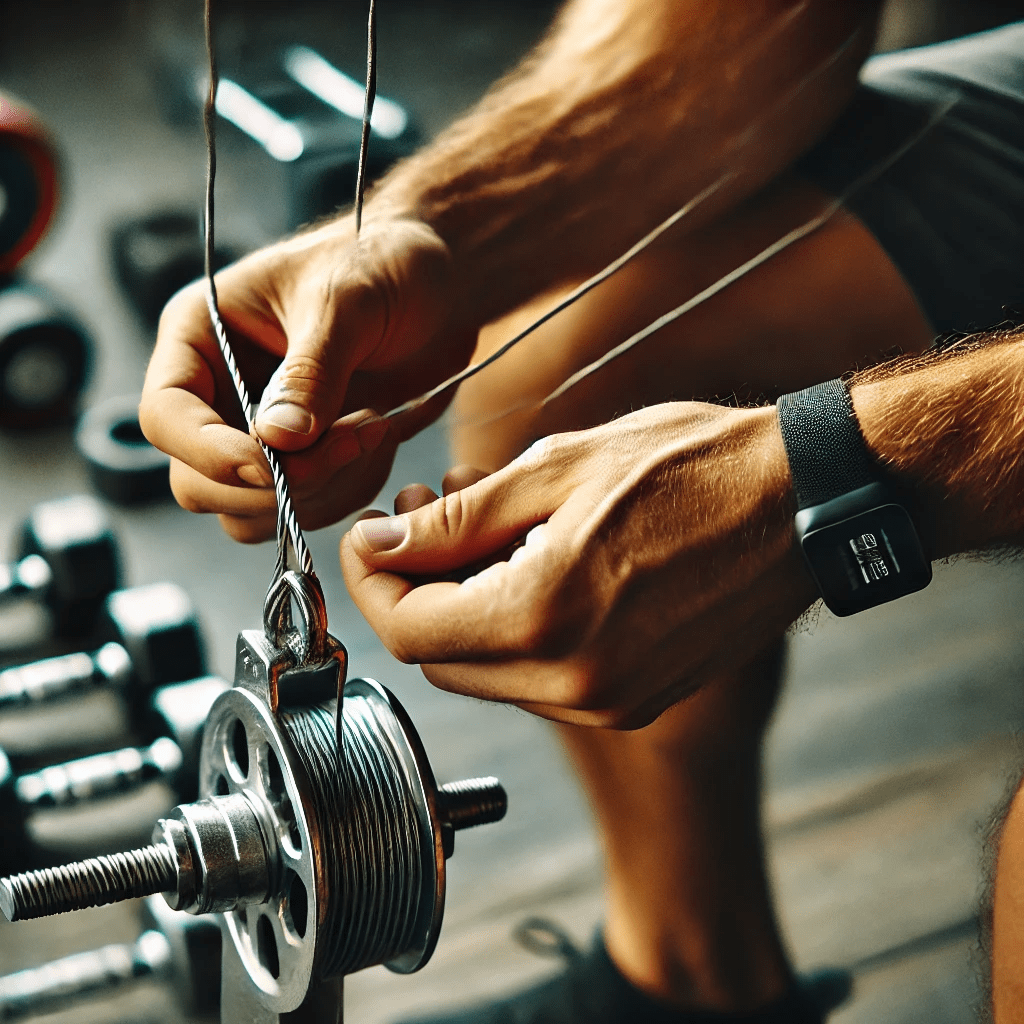
The next step is to thread the steel cable through the pulleys. Start by attaching one end of the cable to the weight stack or weight plate. Thread the cable through the pulleys, making sure it follows the correct path for the exercises you plan to perform. If you are building a system with multiple pulleys, ensure that the cable passes through each pulley in the correct sequence.
Once the cable is threaded through the pulleys, attach the other end to the handle or bar you will use for your exercises. Use a secure connection, such as a carabiner, to attach the handle. Make sure the cable is taut but not overly tight. A properly tensioned cable will ensure smooth operation and prevent unnecessary wear on the pulleys.
Step 5: Attach the Weights

With the cable threaded through the pulleys, the next step is to attach the weights. The weights provide the resistance for your exercises, so it’s important to choose a weight that matches your fitness level and workout goals. Attach the weight plates to the cable using a secure hook or carabiner. Make sure the connection is strong and secure to avoid accidents during your workouts.
If your DIY home gym pulley system is designed to allow for adjustable weights, you can add or remove weight plates as needed. This flexibility allows you to customize your workout and progressively increase the resistance as you build strength.
Step 6: Test the System
Once your DIY home gym pulley system is fully assembled, it’s crucial to test it before you start using it for your workouts. Begin by performing a few light exercises to check the stability and operation of the system. Pay attention to any unusual noises or resistance, as these could indicate a problem with the pulleys, cable, or mounting brackets.
Make sure the cable moves smoothly through the pulleys and that the weights move up and down without any jerking or sticking. If you notice any issues, such as the cable binding or the pulleys not rotating freely, stop and make the necessary adjustments. Regular testing and maintenance are essential to keep your DIY home gym pulley system in top condition and to ensure your safety during workouts.
Step 7: Fine-Tuning and Adjustments
After testing your DIY home gym pulley system, you may need to make some fine-tuning adjustments to optimize its performance. For example, you may need to adjust the tension of the cable, reposition the pulleys, or change the height of the mounting brackets. These adjustments can help ensure that your pulley system operates smoothly and provides the best possible workout experience.
Additionally, consider adding any accessories or attachments that might enhance your workouts. For example, you could add a tricep rope, a lat bar, or ankle straps to increase the variety of exercises you can perform with your DIY home gym pulley system. By customizing your system to fit your needs, you can create a versatile and effective workout station that meets all your fitness goals.
Safety Tips for Using a DIY Home Gym Pulley System
Safety is paramount when using any gym equipment, and a DIY home gym pulley system is no exception. Here are some essential safety tips to keep in mind:
- Regular Inspections: Regularly inspect your DIY home gym pulley system for signs of wear and tear, such as frayed cables, loose connections, or damaged pulleys. Address any issues immediately to prevent accidents.
- Proper Weight Handling: Always use weight plates that are appropriate for your fitness level and the capacity of your pulley system. Overloading the system can lead to equipment failure and injury.
- Secure Attachments: Make sure all attachments, including the cable, pulleys, weights, and handle, are securely fastened before use. Loose connections can cause the system to malfunction during a workout.
- Controlled Movements: Perform exercises with controlled movements to avoid putting excessive strain on the pulley system. Jerky or rapid movements can cause the cable to slip or the pulleys to bind.
- Use a Spotter: If you are lifting heavy weights, consider using a spotter to help you during your workout. A spotter can assist and ensure your safety, especially during challenging exercises.
Exercises You Can Perform with a DIY Home Gym Pulley System
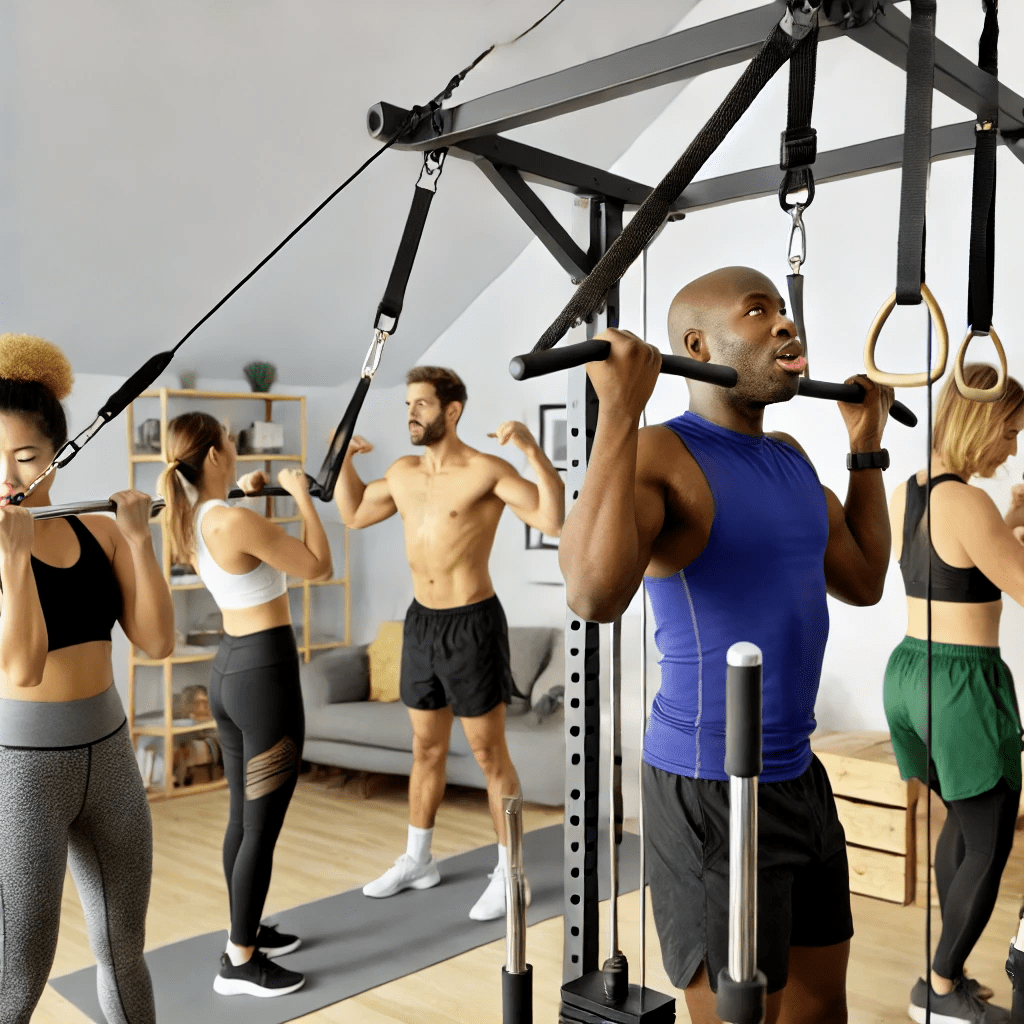
A DIY home gym pulley system allows you to perform a wide variety of exercises that target different muscle groups. Here are some of the most popular exercises you can do with your pulley system:
Lat Pull-Downs
Lat pull-downs are a great exercise for building upper back strength and improving overall posture. To perform this exercise, sit down on a bench with your knees secured under the pad. Grab the lat bar attached to the pulley system with a wide grip, and pull the bar down towards your chest, squeezing your shoulder blades together at the bottom of the movement. Slowly return the bar to the starting position and repeat.
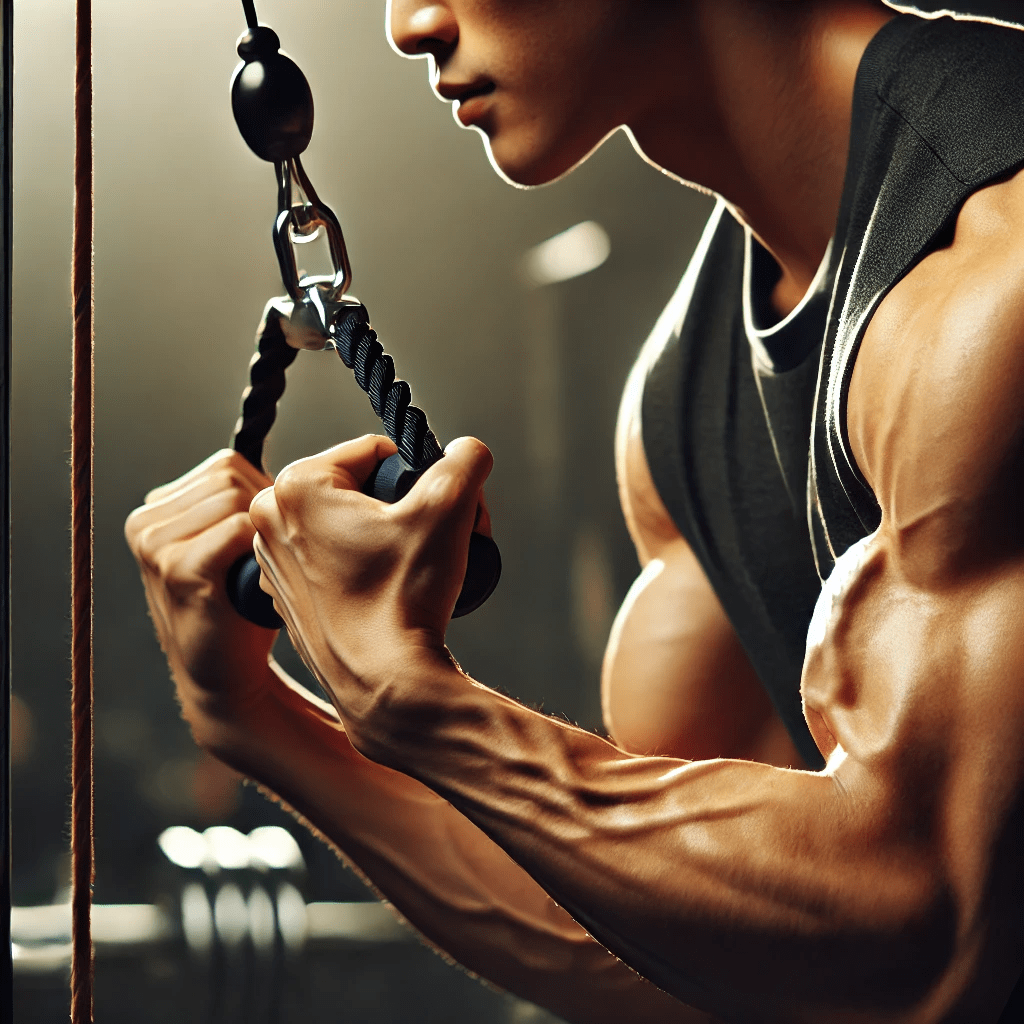
Tricep Extensions
Tricep extensions are an excellent exercise for targeting the triceps, the muscles on the back of your upper arm. Stand facing the pulley system with the cable attachment at the highest setting. Grab the handle with both hands, keeping your elbows close to your sides. Push the handle down until your arms are fully extended, then slowly return to the starting position.
Bicep Curls
Bicep curls are a classic exercise for building strength and size in the biceps. Attach a straight bar to the pulley system and set the cable at the lowest setting. Stand facing the pulley, grab the bar with an underhand grip, and curl the bar towards your chest, keeping your elbows close to your sides. Slowly lower the bar back to the starting position.
Seated Rows
Seated rows target the muscles of the upper back and help improve posture. Sit on the floor or a bench with your feet secured, facing the pulley system. Grab the handle or bar with both hands and pull it towards your torso, squeezing your shoulder blades together at the end of the movement. Slowly return to the starting position and repeat.
Face Pulls
Face pulls are a great exercise for strengthening the rear delts and improving shoulder health. Attach a rope handle to the pulley system and set the cable at about head height. Stand facing the pulley, grab the ends of the rope, and pull it towards your face, keeping your elbows high. Focus on squeezing your shoulder blades together at the end of the movement.
Leg Extensions
Leg extensions are effective for targeting the quadriceps. Attach an ankle strap to the pulley system and set the cable at the lowest setting. Sit on a bench and attach the strap to your ankle. Extend your leg out in front of you, contracting your quadriceps at the top of the movement, and then slowly lower your leg back to the starting position.
Cable Crunches
Cable crunches are an excellent way to target your abdominal muscles. Attach a rope handle to the pulley system and set the cable at a high setting. Kneel facing the pulley, grab the ends of the rope, and pull it down towards your knees while contracting your abs. Slowly return to the starting position and repeat.
Advanced Tips for Your DIY Home Gym Pulley System
To get the most out of your DIY home gym pulley system, consider these advanced tips:
- Multiple Pulley Configurations: Experiment with different pulley configurations to create varying levels of resistance and angles of pull. For example, using two pulleys can reduce the load, making it easier to perform exercises with lighter weights or more reps.
- Adjustable Resistance: Consider incorporating a weight stack or adjustable resistance bands into your pulley system for more precise control over the resistance. This feature is especially useful if you share the gym with others who have different strength levels.
- Cable Attachments: Invest in a variety of cable attachments, such as a V-bar, ankle straps, or tricep ropes, to add variety to your workouts and target different muscle groups more effectively.
- Cable Maintenance: Keep your cable in good condition by regularly applying a light lubricant to reduce friction and prevent wear. This will ensure smooth operation and extend the lifespan of your DIY home gym pulley system.
- Progressive Overload: To continue making gains, gradually increase the resistance or complexity of your exercises. This can be done by adding more weight, performing more challenging movements, or increasing the number of reps and sets.
FAQs About DIY Home Gym Pulley Systems
Q: How much weight can a DIY home gym pulley system handle?
A: The weight capacity of your DIY home gym pulley system depends on the quality of the materials used, particularly the pulleys, cables, and mounting brackets. High-quality components can typically handle anywhere from 100 to 300 pounds, but always check the specifications of each part to ensure safety.
Q: Can I install a DIY home gym pulley system in a small space?
A: Yes, one of the advantages of a DIY home gym pulley system is its adaptability to small spaces. By carefully planning the layout and choosing compact components, you can create an effective pulley system in even the smallest of home gyms.
Q: What exercises are best for beginners using a DIY home gym pulley system?
A: Beginners should start with basic exercises like lat pull-downs, bicep curls, and tricep extensions. These exercises are relatively easy to perform and help build a foundation of strength before moving on to more complex movements.
Q: How do I know if my DIY home gym pulley system is safe to use?
A: Regularly inspect your pulley system for any signs of wear or damage. Ensure that all connections are secure, the cable is in good condition, and the pulleys rotate smoothly. If you notice any issues, address them before using the system.
Q: Can I add additional pulleys to my DIY home gym pulley system?
A: Yes, adding additional pulleys can change the resistance and allow for more varied exercises. You can experiment with different pulley setups to create a system that meets your specific workout needs.
Q: How do I maintain my DIY home gym pulley system?
A: Regular maintenance involves checking all components for wear, lubricating the cable and pulleys, and ensuring all bolts and screws are tight. Proper maintenance will keep your pulley system running smoothly and extend its lifespan.
Q: Can a DIY home gym pulley system be used for rehabilitation exercises?
A: Absolutely. A DIY home gym pulley system can be an excellent tool for rehabilitation exercises, especially for individuals recovering from injuries. The system allows for controlled, low-impact movements that can aid in recovery.
Q: How long does it take to build a DIY home gym pulley system?
A: The time required to build a DIY home gym pulley system depends on your experience with DIY projects and the complexity of the system you are building. A basic system can be assembled in a few hours, while more complex setups may take longer.
Q: Is it cheaper to build a DIY home gym pulley system than to buy one?
A: Yes, building a DIY home gym pulley system is generally more cost-effective than purchasing a commercial system. By sourcing your own materials, you can save money and customize the system to your exact specifications.
Q: Can I use my DIY home gym pulley system for full-body workouts?
A: Yes, a well-designed DIY home gym pulley system can be used for a full-body workout. By incorporating different attachments and adjusting the height and angle of the pulleys, you can target virtually every muscle group.
Conclusion
Building your own DIY home gym pulley system is a rewarding project that can significantly elevate your home workout experience. This system not only allows you to perform a diverse range of exercises, but it also offers the flexibility to tailor your gym setup to your specific needs and available space. By carefully following the steps outlined in this guide, you can create a safe, efficient, and versatile DIY home gym pulley system that will serve you well for many years.
If you’re looking for more ways to enhance your home gym setup, consider exploring our guides on the best bumper pool table and best lighting for pool table. These resources can provide additional inspiration and ideas for optimizing your space. For further expert advice on fitness equipment, websites like Rogue Fitness and Fitness Factory offer a wide range of gym solutions that can complement your DIY setup.
By dedicating time to the planning, construction, and maintenance of your DIY home gym pulley system, you’re making a long-term investment in a fitness solution that is both cost-effective and highly functional. Whether you’re just starting or you’re a seasoned fitness enthusiast, this system will empower you to achieve your workout goals without ever having to leave the comfort of your home. Start building your DIY home gym pulley system today and embark on the path to a stronger, healthier you!