DIY Felt Hat: Your Best Guide in 2025
Crafting a DIY felt hat can be a rewarding experience that allows you to express your creativity and fashion sense. Whether you’re looking to create a stylish accessory or a unique gift, making a DIY felt hat is a fantastic project. In this guide, we will take you through the step-by-step process of creating your own felt hat, provide tips and tricks, and answer common questions to ensure your DIY felt hat turns out perfectly. With our comprehensive guide, you’ll be ready to make your DIY felt hat in no time!
How to Make a DIY Felt Hat
Step 1: Gather Your Materials
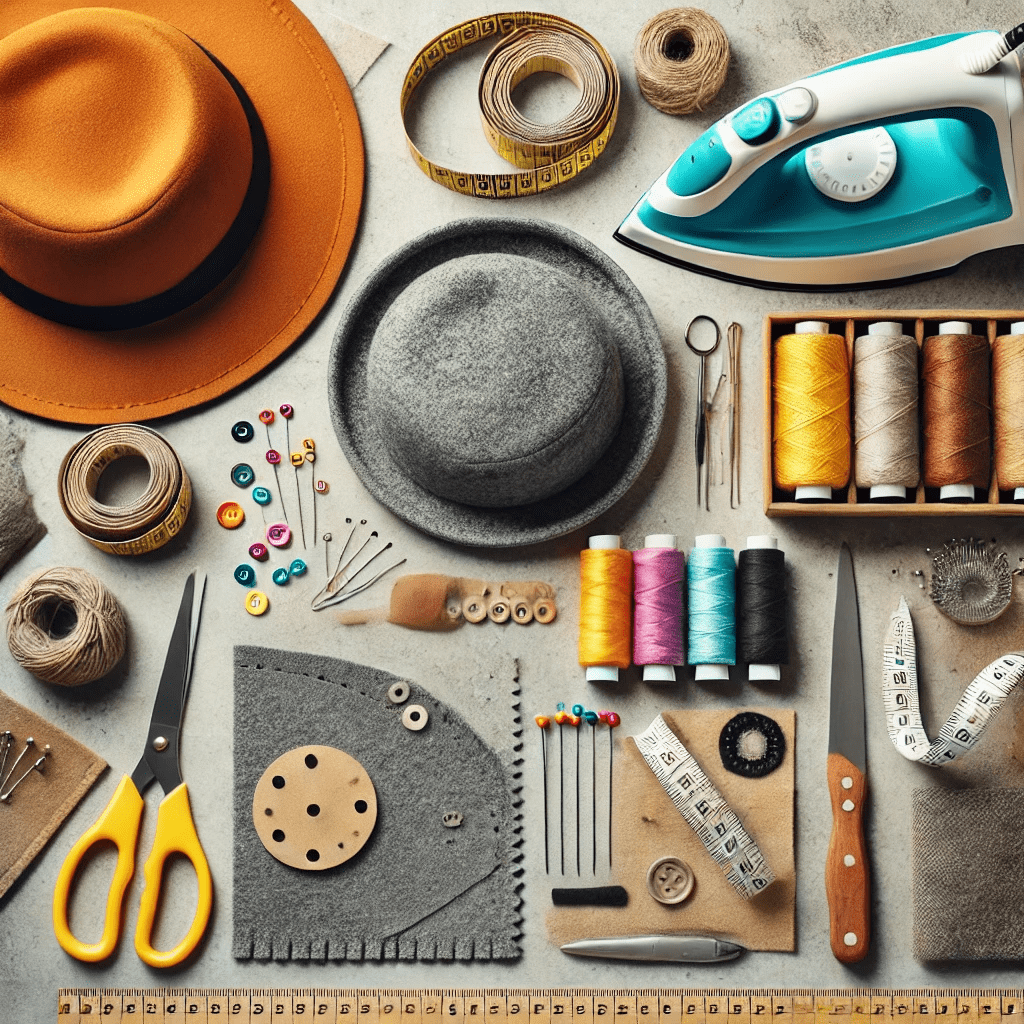
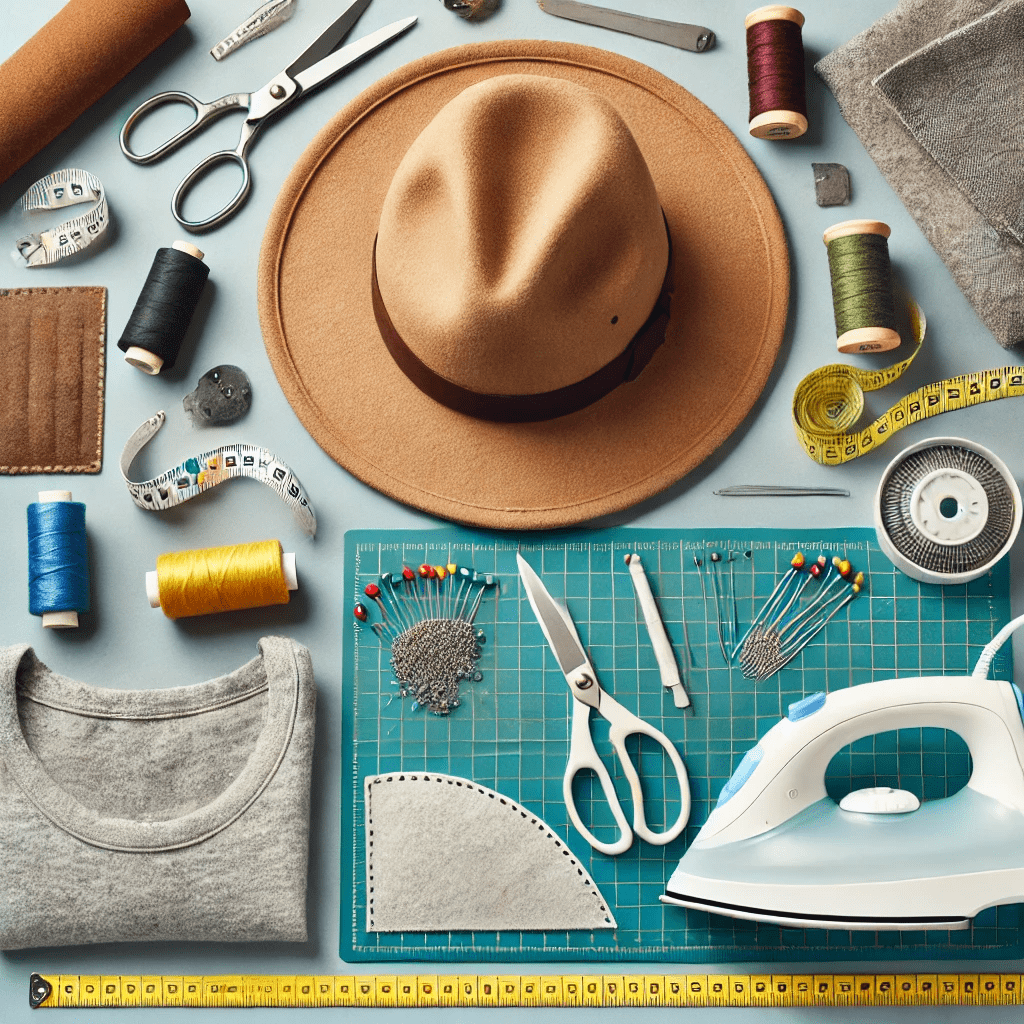
To create your DIY felt hat, you’ll need the following materials:
- Felt fabric (choose a color you love)
- Scissors
- Measuring tape
- Sewing needle and thread
- Hat pattern (can be found online or create your own)
- Pins
- Chalk or fabric marker
- Iron and ironing board
Creating a DIY felt hat starts with gathering the right materials. The felt fabric is the most critical component of your DIY felt hat. When choosing your felt fabric, consider the thickness and texture of the material, as this will affect the overall look and feel of your DIY felt hat. Opt for high-quality felt fabric to ensure that your DIY felt hat is durable and looks professional. Additionally, make sure you have a reliable pair of scissors to cut the felt fabric accurately.
A measuring tape is essential to ensure that your DIY felt hat fits perfectly. A sewing needle and thread are necessary for assembling the hat, while a hat pattern will guide you in cutting the felt fabric into the right shapes and sizes. Pins will help hold the fabric pieces in place as you sew, and a chalk or fabric marker will allow you to mark the fabric without damaging it. Finally, an iron and ironing board will be needed to smooth out the fabric and give your DIY felt hat a polished finish.
Step 2: Measure and Cut the Felt
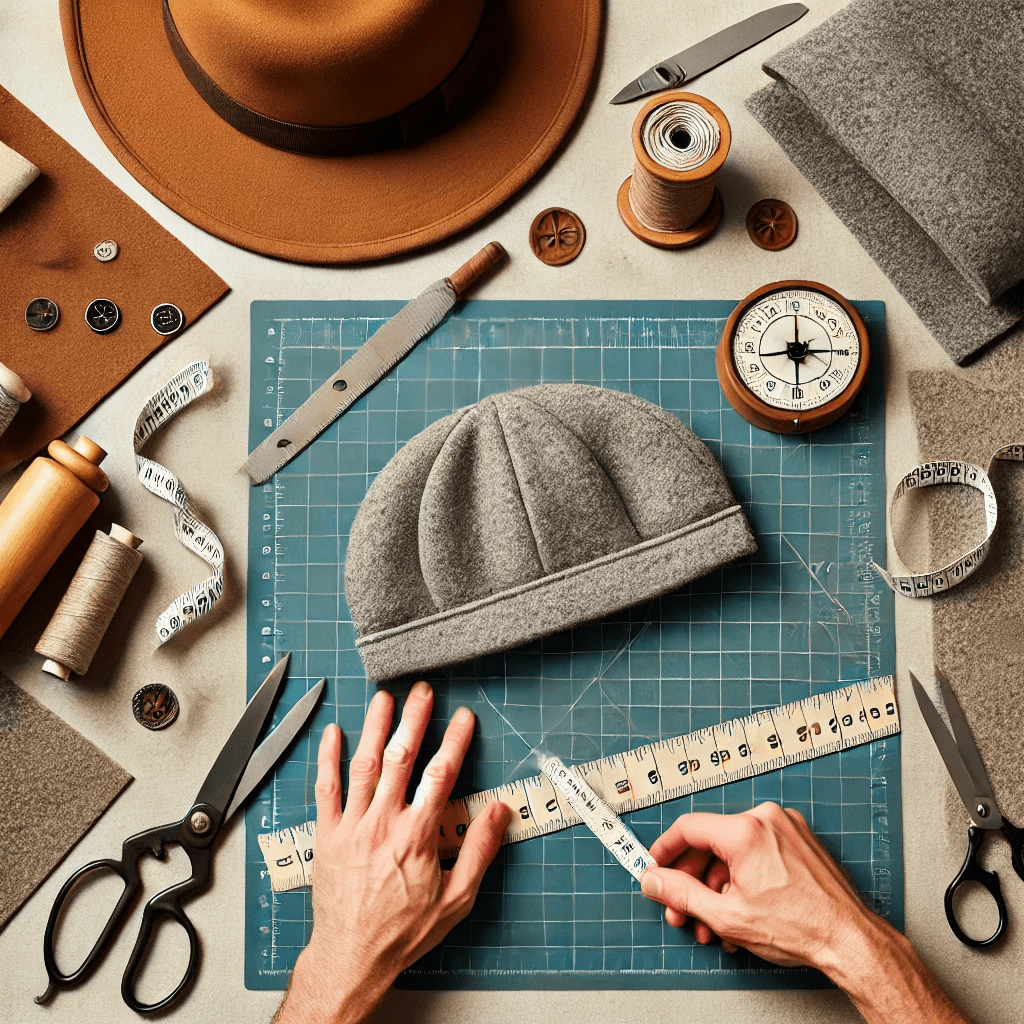
Start by measuring your head circumference using a measuring tape. Use this measurement to adjust your hat pattern to ensure a perfect fit. Lay your felt fabric flat and use the hat pattern to mark the pieces with chalk or a fabric marker. Carefully cut out the felt pieces, making sure to follow the pattern accurately.
Measuring and cutting the felt fabric are crucial steps in making a DIY felt hat. Accurate measurements ensure that your DIY felt hat will fit comfortably and look good. When measuring your head circumference, make sure to wrap the measuring tape snugly around the widest part of your head, typically just above your ears and eyebrows. Write down this measurement and use it to adjust your hat pattern. If you are creating your own pattern, make sure to include seam allowances to ensure that your DIY felt hat is not too tight.
Once you have adjusted your pattern, lay the felt fabric flat on a clean surface. Use the chalk or fabric marker to trace the pattern pieces onto the felt fabric. Make sure to mark the pieces accurately, as any mistakes at this stage can affect the final look of your DIY felt hat. After marking the pieces, use your scissors to carefully cut out the felt fabric. Take your time to ensure that the edges are clean and even, as this will make the sewing process easier and result in a more professional-looking DIY felt hat.
Step 3: Pin the Pieces Together

Once you have all your felt pieces cut out, pin them together according to the pattern instructions. This typically includes pinning the brim, crown, and any decorative elements you’ve chosen. Pinning ensures that the pieces stay in place while you sew.
Pinning the pieces together is an essential step in assembling your DIY felt hat. By pinning the felt pieces together, you can ensure that they stay in place while you sew, making the sewing process easier and more accurate. Start by laying out the cut felt pieces according to the pattern instructions. Begin with the crown of the hat, which is the main body of the DIY felt hat. Pin the side seams of the crown together, making sure the edges align perfectly.
Next, pin the brim of the hat to the bottom edge of the crown. If your hat pattern includes additional pieces, such as a band or decorative elements, pin these in place as well. Use enough pins to hold the pieces securely, but avoid placing them too close to the edge where you will be sewing. This will prevent the pins from getting in the way as you sew your DIY felt hat. Once all the pieces are pinned together, double-check that everything is aligned correctly and that there are no gaps or overlaps.
Step 4: Sew the Hat
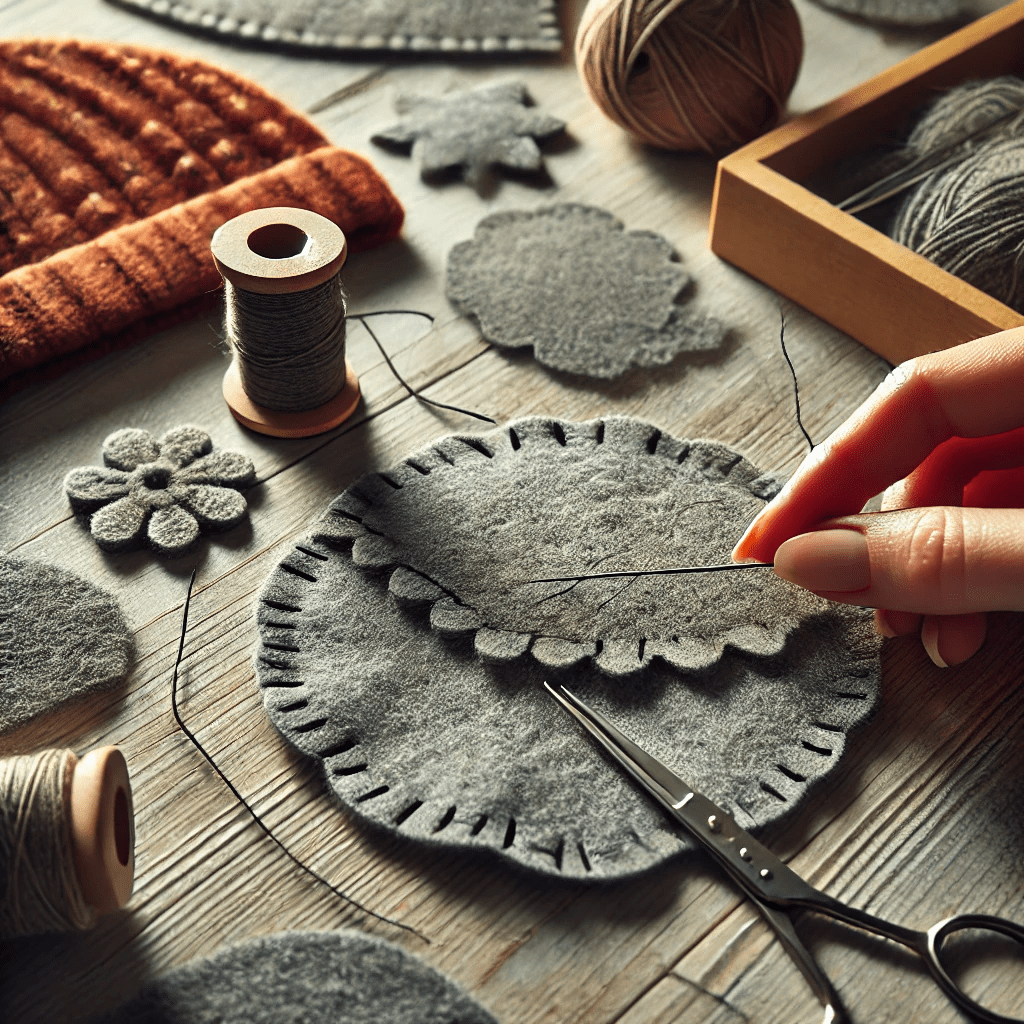
Using a needle and thread, begin sewing the felt pieces together. Start with the crown and brim, making sure your stitches are even and secure. For a cleaner finish, use a whip stitch or blanket stitch around the edges. Take your time with this step to ensure the hat is sturdy and well-constructed.
Sewing the hat is where your DIY felt hat really starts to take shape. It’s important to use even, secure stitches to ensure that your DIY felt hat is sturdy and looks professional. Begin by sewing the side seams of the crown together. Use a whip stitch or blanket stitch for a clean finish. A whip stitch involves passing the needle and thread over the edge of the fabric, while a blanket stitch involves creating a loop around the edge of the fabric before pulling the thread through. Both stitches are suitable for sewing felt fabric and will create a neat, durable seam.
Once the side seams of the crown are sewn, attach the brim to the bottom edge of the crown. Make sure to sew around the brim, securing it firmly to the crown. If your hat pattern includes additional pieces, such as a band or decorative elements, sew these in place as well. Take your time with this step, as careful sewing will result in a more polished DIY felt hat. If you are new to sewing, practice your stitches on a scrap piece of felt fabric before sewing your DIY felt hat. This will help you get a feel for the fabric and improve your sewing skills.
Step 5: Iron the Hat
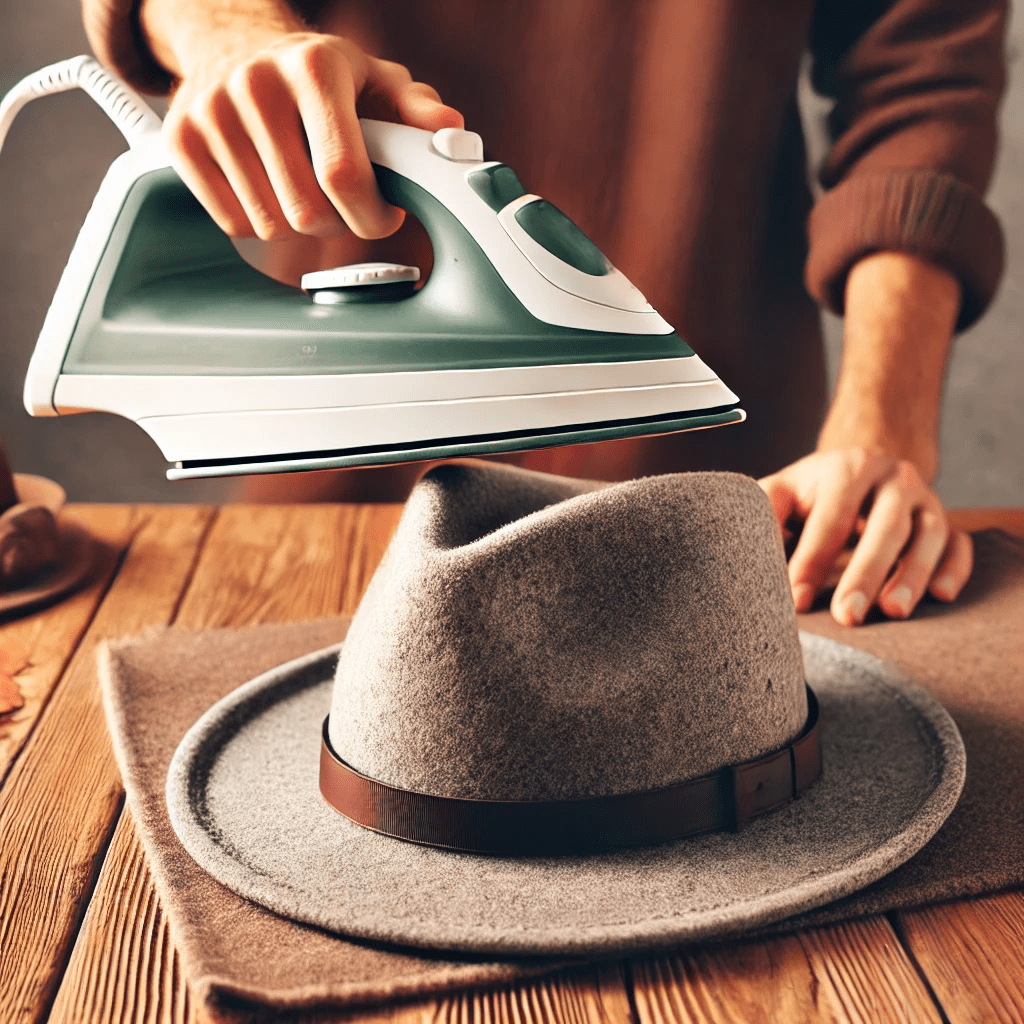
After sewing, gently iron the hat to smooth out any wrinkles and help shape it. Use a low heat setting to avoid damaging the felt. Ironing will give your DIY felt hat a professional finish and make it more comfortable to wear.
Ironing the hat is an important step in finishing your DIY felt hat. Ironing will help to smooth out any wrinkles in the felt fabric and give your DIY felt hat a polished, professional look. Before you begin ironing, set your iron to a low heat setting to avoid damaging the felt. Felt fabric can be sensitive to high heat, so it’s important to use a low setting and avoid pressing the iron too hard. Place your DIY felt hat on the ironing board and gently press the iron over the fabric.
Focus on smoothing out any wrinkles and shaping the hat to your desired form. If your hat pattern includes a brim, make sure to iron it flat and even. Take your time with this step to ensure that your DIY felt hat looks its best. If you have any concerns about ironing the felt fabric, test the iron on a scrap piece of felt before ironing your DIY felt hat. This will help you determine the right heat setting and avoid any potential damage to the fabric.
Step 6: Add Finishing Touches
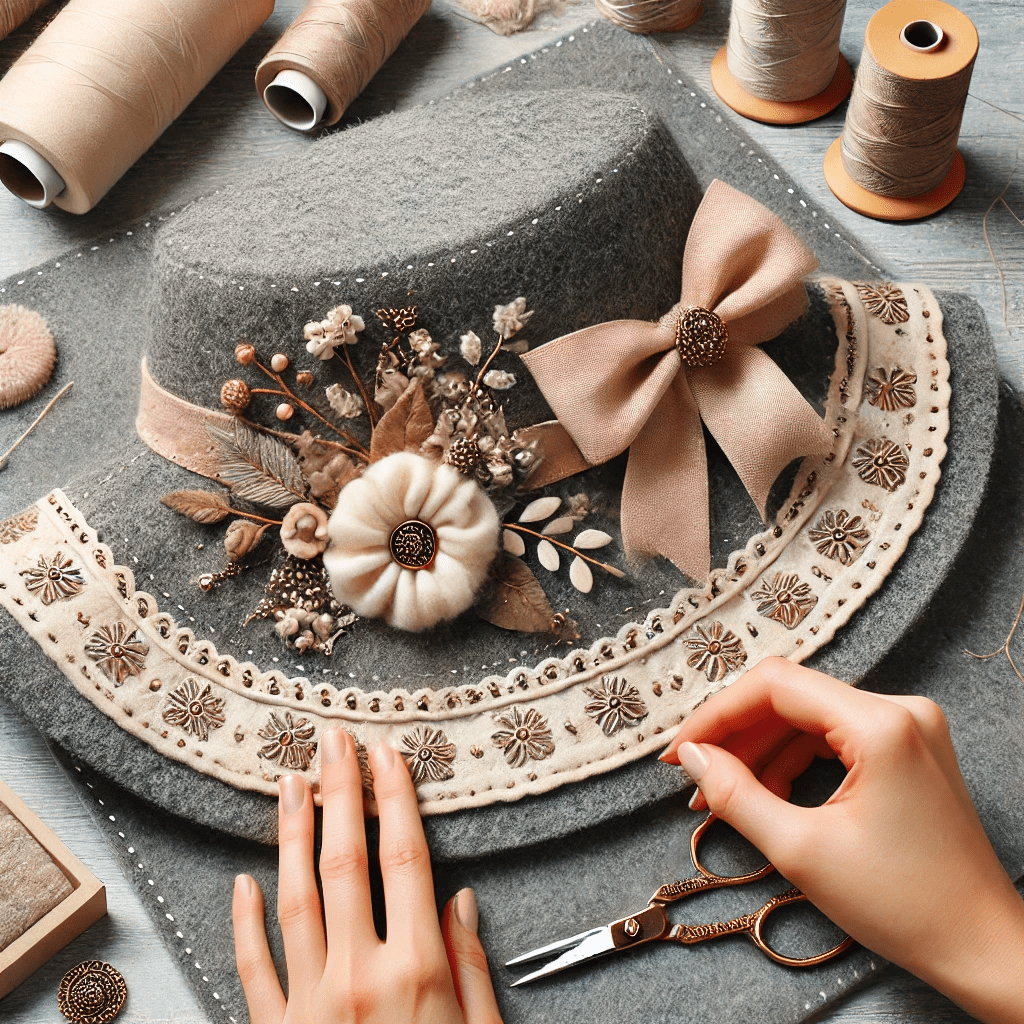
Now that your hat is assembled and ironed, it’s time to add any finishing touches. This could include adding a ribbon, decorative stitching, or other embellishments to make your hat unique. Be creative and personalize your DIY felt hat to match your style.
Adding finishing touches is where you can really get creative and make your DIY felt hat unique. There are many ways to personalize your hat and add decorative elements. One popular option is to add a ribbon around the base of the crown. Choose a ribbon in a color that complements your felt fabric and tie it in a bow or knot. You can also add decorative stitching around the edges of the hat or along the seams.
Use a contrasting thread color to make the stitching stand out and add visual interest to your DIY felt hat. If you want to get even more creative, consider adding additional embellishments such as buttons, beads, or fabric flowers. These can be sewn or glued onto the hat to create a custom look. Take your time with this step and have fun experimenting with different ideas. The finishing touches will make your DIY felt hat truly one-of-a-kind and reflect your personal style.
FAQs
How long does it take to make a DIY felt hat?
The time required to make a DIY felt hat can vary depending on your skill level and the complexity of the hat design. On average, it can take anywhere from 2 to 5 hours to complete. Creating a DIY felt hat is a project that can be completed in a single afternoon or spread out over several days, depending on your schedule and the complexity of the hat design.
If you are new to sewing, it may take longer to complete your first DIY felt hat as you get the hang of measuring, cutting, and sewing the felt fabric. It’s important to be patient and take your time with each step to ensure the best results. More experienced crafters may be able to complete a simple DIY felt hat in just a couple of hours. The complexity of the design also plays a significant role; a basic hat with minimal embellishments will naturally take less time than a more intricate design with multiple decorative elements.
Regardless of your skill level, take your time and enjoy the process of creating your DIY felt hat. The time and effort you put into making your hat will be reflected in the final product. It’s a good idea to set aside a few hours when you can work without interruptions. This allows you to focus on the project and ensures that you can take your time to perfect each step. Remember, the process of creating your DIY felt hat is just as rewarding as the finished product.
Can I use different types of felt for my hat?
Yes, you can use different types of felt, such as wool felt or synthetic felt. Wool felt is generally more durable and has a higher-quality finish, but synthetic felt can be a more affordable option. When choosing felt fabric for your DIY felt hat, consider the different types of felt available. Wool felt is made from natural wool fibers and is known for its durability and high-quality finish. It is a popular choice for DIY felt hats because it holds its shape well and has a luxurious feel. However, wool felt can be more expensive than synthetic felt.
Synthetic felt, on the other hand, is made from man-made fibers and is generally more affordable. It comes in a wide variety of colors and is a good option for beginners or those on a budget. Synthetic felt is also easier to clean and care for, making it a practical choice for DIY felt hats that will be worn frequently. Both types of felt can be used to create beautiful DIY felt hats, so choose the one that best fits your needs and preferences.
Another factor to consider is the thickness of the felt. Thicker felt will provide more structure and durability, making it ideal for more formal or structured hat designs. Thinner felt is more flexible and can be easier to work with, especially for beginners or for more casual hat designs. Consider the final look and purpose of your DIY felt hat when choosing the type of felt to use.
Do I need a sewing machine to make a DIY felt hat?
No, you don’t need a sewing machine. While a sewing machine can speed up the process, you can also sew your hat by hand using a simple needle and thread. A sewing machine is not required to make a DIY felt hat. While a sewing machine can speed up the process and create more uniform stitches, you can also sew your hat by hand using a needle and thread. Hand sewing is a great option for those who do not have access to a sewing machine or prefer the precision and control of hand stitching.
When sewing by hand, use small, even stitches to ensure that your DIY felt hat is sturdy and well-constructed. A whip stitch or blanket stitch is recommended for sewing felt fabric, as these stitches create a clean finish and are easy to learn. If you are new to sewing, practice your stitches on a scrap piece of felt fabric before sewing your DIY felt hat. This will help you get comfortable with the technique and improve your sewing skills.
Hand sewing also allows for greater control and precision, which can be especially useful when working with detailed or intricate designs. You can take your time to ensure that each stitch is perfectly placed, resulting in a high-quality finished product. Additionally, hand sewing can be a relaxing and meditative activity, making the process of creating your DIY felt hat even more enjoyable.
How do I choose the right hat pattern?
There are many free hat patterns available online. Choose a pattern that matches your skill level and the style of hat you want to create. Make sure the pattern includes clear instructions and measurements. Choosing the right hat pattern is an important step in making a DIY felt hat. There are many free hat patterns available online, so take the time to browse different options and find one that suits your needs. When selecting a pattern, consider your skill level and the style of hat you want to create. If you are a beginner, look for a simple pattern with clear instructions and minimal pieces.
As you gain more experience, you can try more complex patterns with additional details and embellishments. Make sure the pattern includes accurate measurements and seam allowances to ensure that your DIY felt hat fits properly. If you have trouble finding a pattern that you like, consider creating your own. This can be a fun and rewarding challenge that allows you to design a truly unique hat.
When choosing a pattern, also consider the type of felt you are using. Some patterns may be better suited for thicker or thinner felt, so make sure the pattern you choose will work well with your chosen fabric. Additionally, look for patterns that include detailed instructions and illustrations, as these can be very helpful, especially if you are new to hat-making. Don’t be afraid to experiment with different patterns and make adjustments as needed to create a hat that perfectly suits your style and preferences.
Can I wash my DIY felt hat?
It’s best to avoid washing felt hats in water as it can cause the felt to lose its shape. Instead, spot-clean your hat with a damp cloth and let it air dry. Felt fabric is sensitive to water and can lose its shape if washed in water. To clean your DIY felt hat, it’s best to spot-clean it with a damp cloth. Gently blot any stains or dirt with the cloth, being careful not to rub or scrub the fabric.
If necessary, you can use a mild detergent or soap to help remove stubborn stains. After cleaning, let the hat air dry completely before wearing or storing it. Avoid using a hairdryer or other heat sources to dry the hat, as this can cause the felt to shrink or become misshapen. Regularly cleaning your DIY felt hat will help keep it looking its best and extend its lifespan.
In addition to spot-cleaning, there are a few other steps you can take to care for your DIY felt hat and keep it in good condition. Store your hat in a cool, dry place away from direct sunlight to prevent fading and damage. If your hat becomes misshapen, you can use steam to gently reshape it. Hold the hat over a pot of boiling water or use a handheld steamer, and carefully reshape the felt with your hands. Be sure to let the hat cool and dry completely before wearing or storing it again. Taking these steps to care for your DIY felt hat will ensure that it stays looking great for years to come.
What tools do I need to make a DIY felt hat?
To create a DIY felt hat, you will need a few basic tools and supplies. The exact tools you need will depend on the complexity of the hat design and your personal preferences. Here is a list of the essential tools and supplies for making a DIY felt hat:
- Felt fabric: Choose a high-quality felt fabric in the color of your choice. Make sure you have enough fabric to cut out all the pieces for your hat.
- Hat pattern: A hat pattern will guide you in cutting the felt fabric into the right shapes and sizes. You can find free hat patterns online or create your own.
- Measuring tape: Use a measuring tape to measure your head circumference and adjust the hat pattern to ensure a perfect fit.
- Scissors: A good pair of scissors is essential for cutting the felt fabric accurately. Make sure your scissors are sharp to prevent fraying and uneven edges.
- Sewing needle and thread: Use a needle and thread to sew the felt pieces together. Choose a thread color that matches your felt fabric for a seamless finish.
- Pins: Pins are used to hold the felt pieces in place while you sew. They help ensure that the pieces stay aligned and make the sewing process easier.
- Chalk or fabric marker: Use chalk or a fabric marker to mark the felt fabric according to the hat pattern. This will help you cut the fabric accurately.
- Iron and ironing board: An iron is used to smooth out wrinkles in the felt fabric and shape the hat. Use a low heat setting to avoid damaging the felt.
These are the basic tools and supplies needed to create a DIY felt hat. Depending on the design of your hat, you may also need additional tools and supplies such as ribbons, buttons, beads, or other embellishments. Having the right tools and supplies will make the hat-making process easier and more enjoyable, and help you create a high-quality finished product.
What are some tips for beginners making a DIY felt hat?
If you are new to hat making, here are some tips to help you get started and ensure your DIY felt hat turns out beautifully:
- Start with a simple pattern: Choose a basic hat pattern with minimal pieces and clear instructions. This will make the process easier and help you build your skills and confidence.
- Take your time: Don’t rush through the steps. Take your time to measure, cut, and sew the felt fabric accurately. This will result in a higher-quality finished product.
- Practice your stitches: If you are new to sewing, practice your stitches on a scrap piece of felt fabric before sewing your hat. This will help you get comfortable with the technique and improve your sewing skills.
- Use pins to hold the pieces in place: Pins are essential for keeping the felt pieces aligned while you sew. Use enough pins to hold the pieces securely, but avoid placing them too close to the edge where you will be sewing.
- Iron the felt fabric: After sewing, gently iron the hat to smooth out any wrinkles and shape it. Use a low heat setting to avoid damaging the felt.
- Get creative with finishing touches: Personalize your hat with ribbons, decorative stitching, or other embellishments. This will make your hat unique and reflect your style.
By following these tips, you’ll be well on your way to creating a beautiful DIY felt hat that you can be proud of. Remember to enjoy the process and have fun with your hat-making project.
How do I store my DIY felt hat?
Proper storage is important to keep your DIY felt hat in good condition. Here are some tips for storing your hat:
- Store your hat in a cool, dry place away from direct sunlight. Sunlight can cause the felt fabric to fade and weaken over time.
- Use a hat box or a clean, dry container to store your hat. This will protect it from dust and damage.
- If your hat becomes misshapen, you can use steam to gently reshape it. Hold the hat over a pot of boiling water or use a handheld steamer, and carefully reshape the felt with your hands. Let the hat cool and dry completely before wearing or storing it again.
- Avoid stacking heavy items on top of your hat, as this can cause it to lose its shape.
- If your hat has embellishments such as ribbons or buttons, make sure they are not crushed or damaged during storage.
By following these storage tips, you can keep your DIY felt hat looking great for years to come.
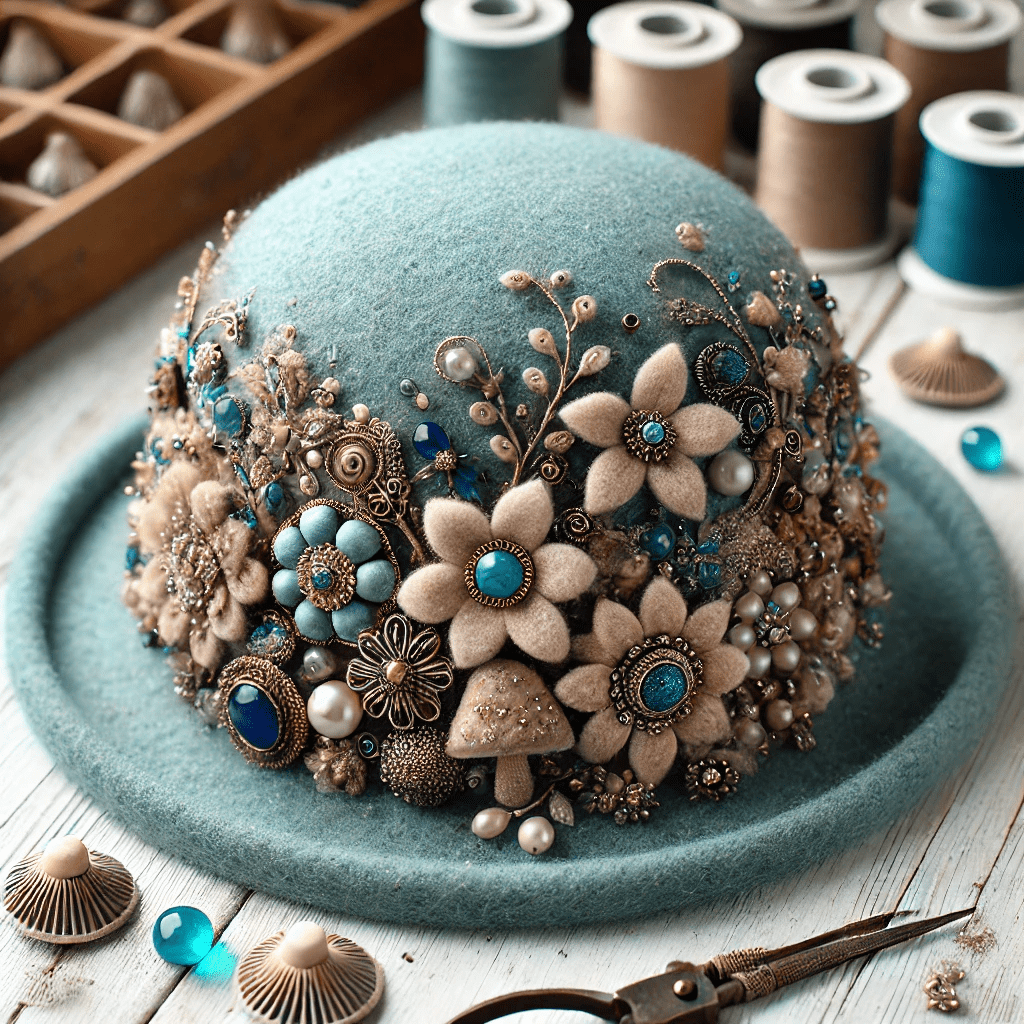
Can I customize my DIY felt hat?
Absolutely! One of the best things about making a DIY felt hat is the ability to customize it to suit your style. Here are some ideas for customizing your hat:
- Add a ribbon or band: Wrap a ribbon or band around the base of the crown and tie it in a bow or knot. Choose a ribbon in a color that complements your felt fabric.
- Decorative stitching: Use a contrasting thread color to add decorative stitching around the edges of the hat or along the seams. This can add visual interest and make your hat stand out.
- Embellishments: Sew or glue on buttons, beads, fabric flowers, or other embellishments to create a unique look.
- Personalize the brim: If your hat has a brim, consider adding a decorative edge or trimming it to a unique shape.
- Dye the felt: If you can’t find felt fabric in the color you want, you can dye white felt using fabric dye. Follow the dye manufacturer’s instructions to achieve the desired color.
By customizing your DIY felt hat, you can create a one-of-a-kind accessory that reflects your personal style and creativity.
What are some common mistakes to avoid when making a DIY felt hat?
Making a DIY felt hat can be a fun and rewarding project, but there are some common mistakes to avoid to ensure your hat turns out well:
- Using the wrong type of felt: Choose a high-quality felt fabric that is suitable for hat making. Avoid using craft felt, as it may not be durable enough for a hat.
- Incorrect measurements: Make sure to measure your head circumference accurately and adjust the hat pattern accordingly. Incorrect measurements can result in a hat that is too tight or too loose.
- Not using enough pins: Use enough pins to hold the felt pieces securely in place while you sew. This will help ensure that the pieces stay aligned and make the sewing process easier.
- Rushing through the sewing process: Take your time when sewing the felt pieces together. Rushing can result in uneven stitches and a less professional finish.
- Not ironing the felt fabric: After sewing, gently iron the hat to smooth out any wrinkles and shape it. This will give your hat a polished, professional look.
- Neglecting finishing touches: Don’t forget to add finishing touches such as ribbons, decorative stitching, or other embellishments. These details can make a big difference in the overall look of your hat.
By avoiding these common mistakes, you can create a beautiful and well-made DIY felt hat that you can be proud of.
Conclusion
Creating a DIY felt hat is a fun and fulfilling project that allows you to showcase your creativity and craftsmanship. By following our step-by-step guide, you’ll be able to make a beautiful and unique felt hat that you can proudly wear or gift. Remember to take your time, enjoy the process, and let your style shine through in your creation.
For more DIY craft ideas, check out our Drawing on Hand Ideas with Pen and SVG in Photoshop articles. If you’re interested in learning more about different types of crafts, visit Craftsy and Michaels for additional resources and inspiration.